Testing a C++ project in Xcode with XCTest
Introduction
In this post, I'm going to document how to setup a C++ project in XCode and test using the XCTest framework.
Xcode
Xcode, Apple's integrated development environment (IDE), offers robust support for C++ development, providing developers with a powerful platform to create efficient and high-performance applications. While traditionally associated with macOS and iOS development, Xcode's versatility extends to C++ projects, offering features like syntax highlighting, code completion, and debugging tools[1] tailored for C++ programming.
[1] XCode provides debugging tools for XCTest (in Objective C and Swift), as I'll go into later on, by incorporating C++ in a Unit Test bundle you can step through lines and debug functions/variables with XCTest. I'm not sure it's possible to incorporate other test frameworks (like Google Test or Boost) and run tests directly within XCode
Unit Testing 🎉
It might sound strange but I really enjoy unit testing. Testing ensures code quality, reduces bugs, and improves overall software reliability. I've often found it easier to jump back into projects when I can start with running the tests and knowing everything works.
In the context of C++ development, where performance and low-level control are often critical, comprehensive testing becomes even more crucial. This helps catch memory leaks, optimise algorithms, and ensure that complex systems function correctly under various conditions.
Creating a New C++ Project in Xcode
I'm going to document Step-by-step on how to build a C++ project using XCode.
To note, I'm working with XCode version 15.4
To begin, create a Command Line Tool
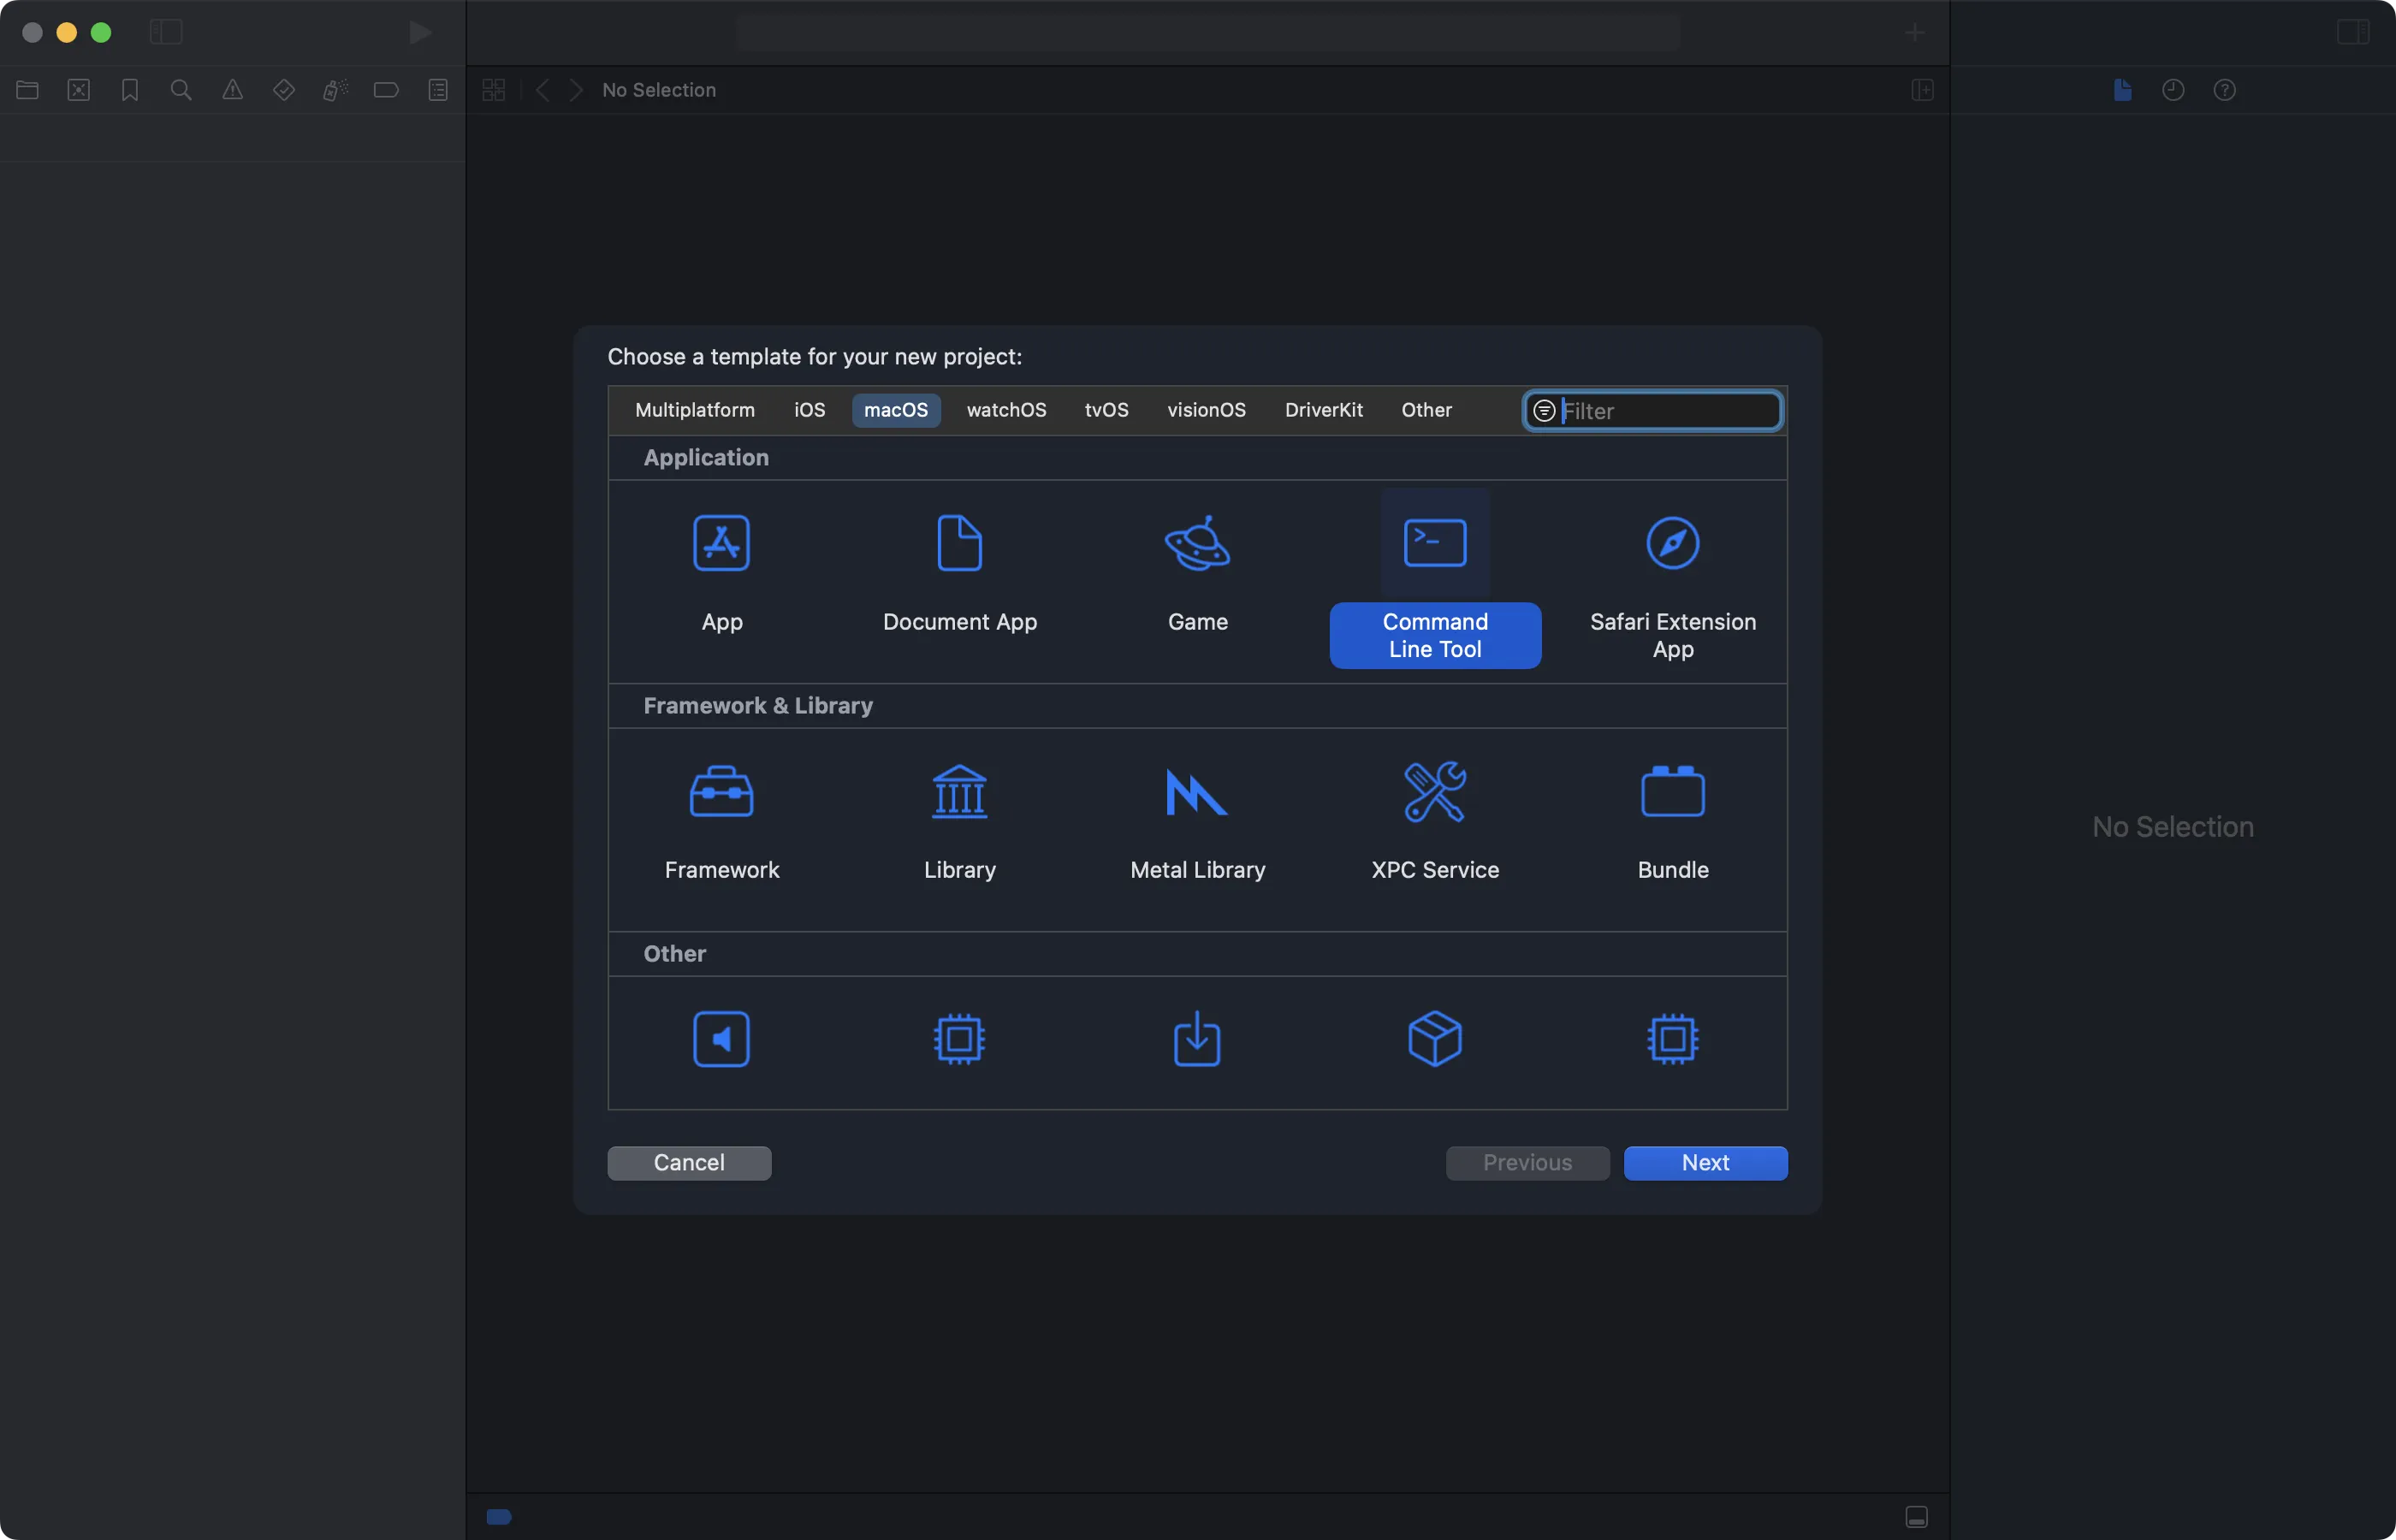
Select C++ as the language

You should now have an blank C++ project
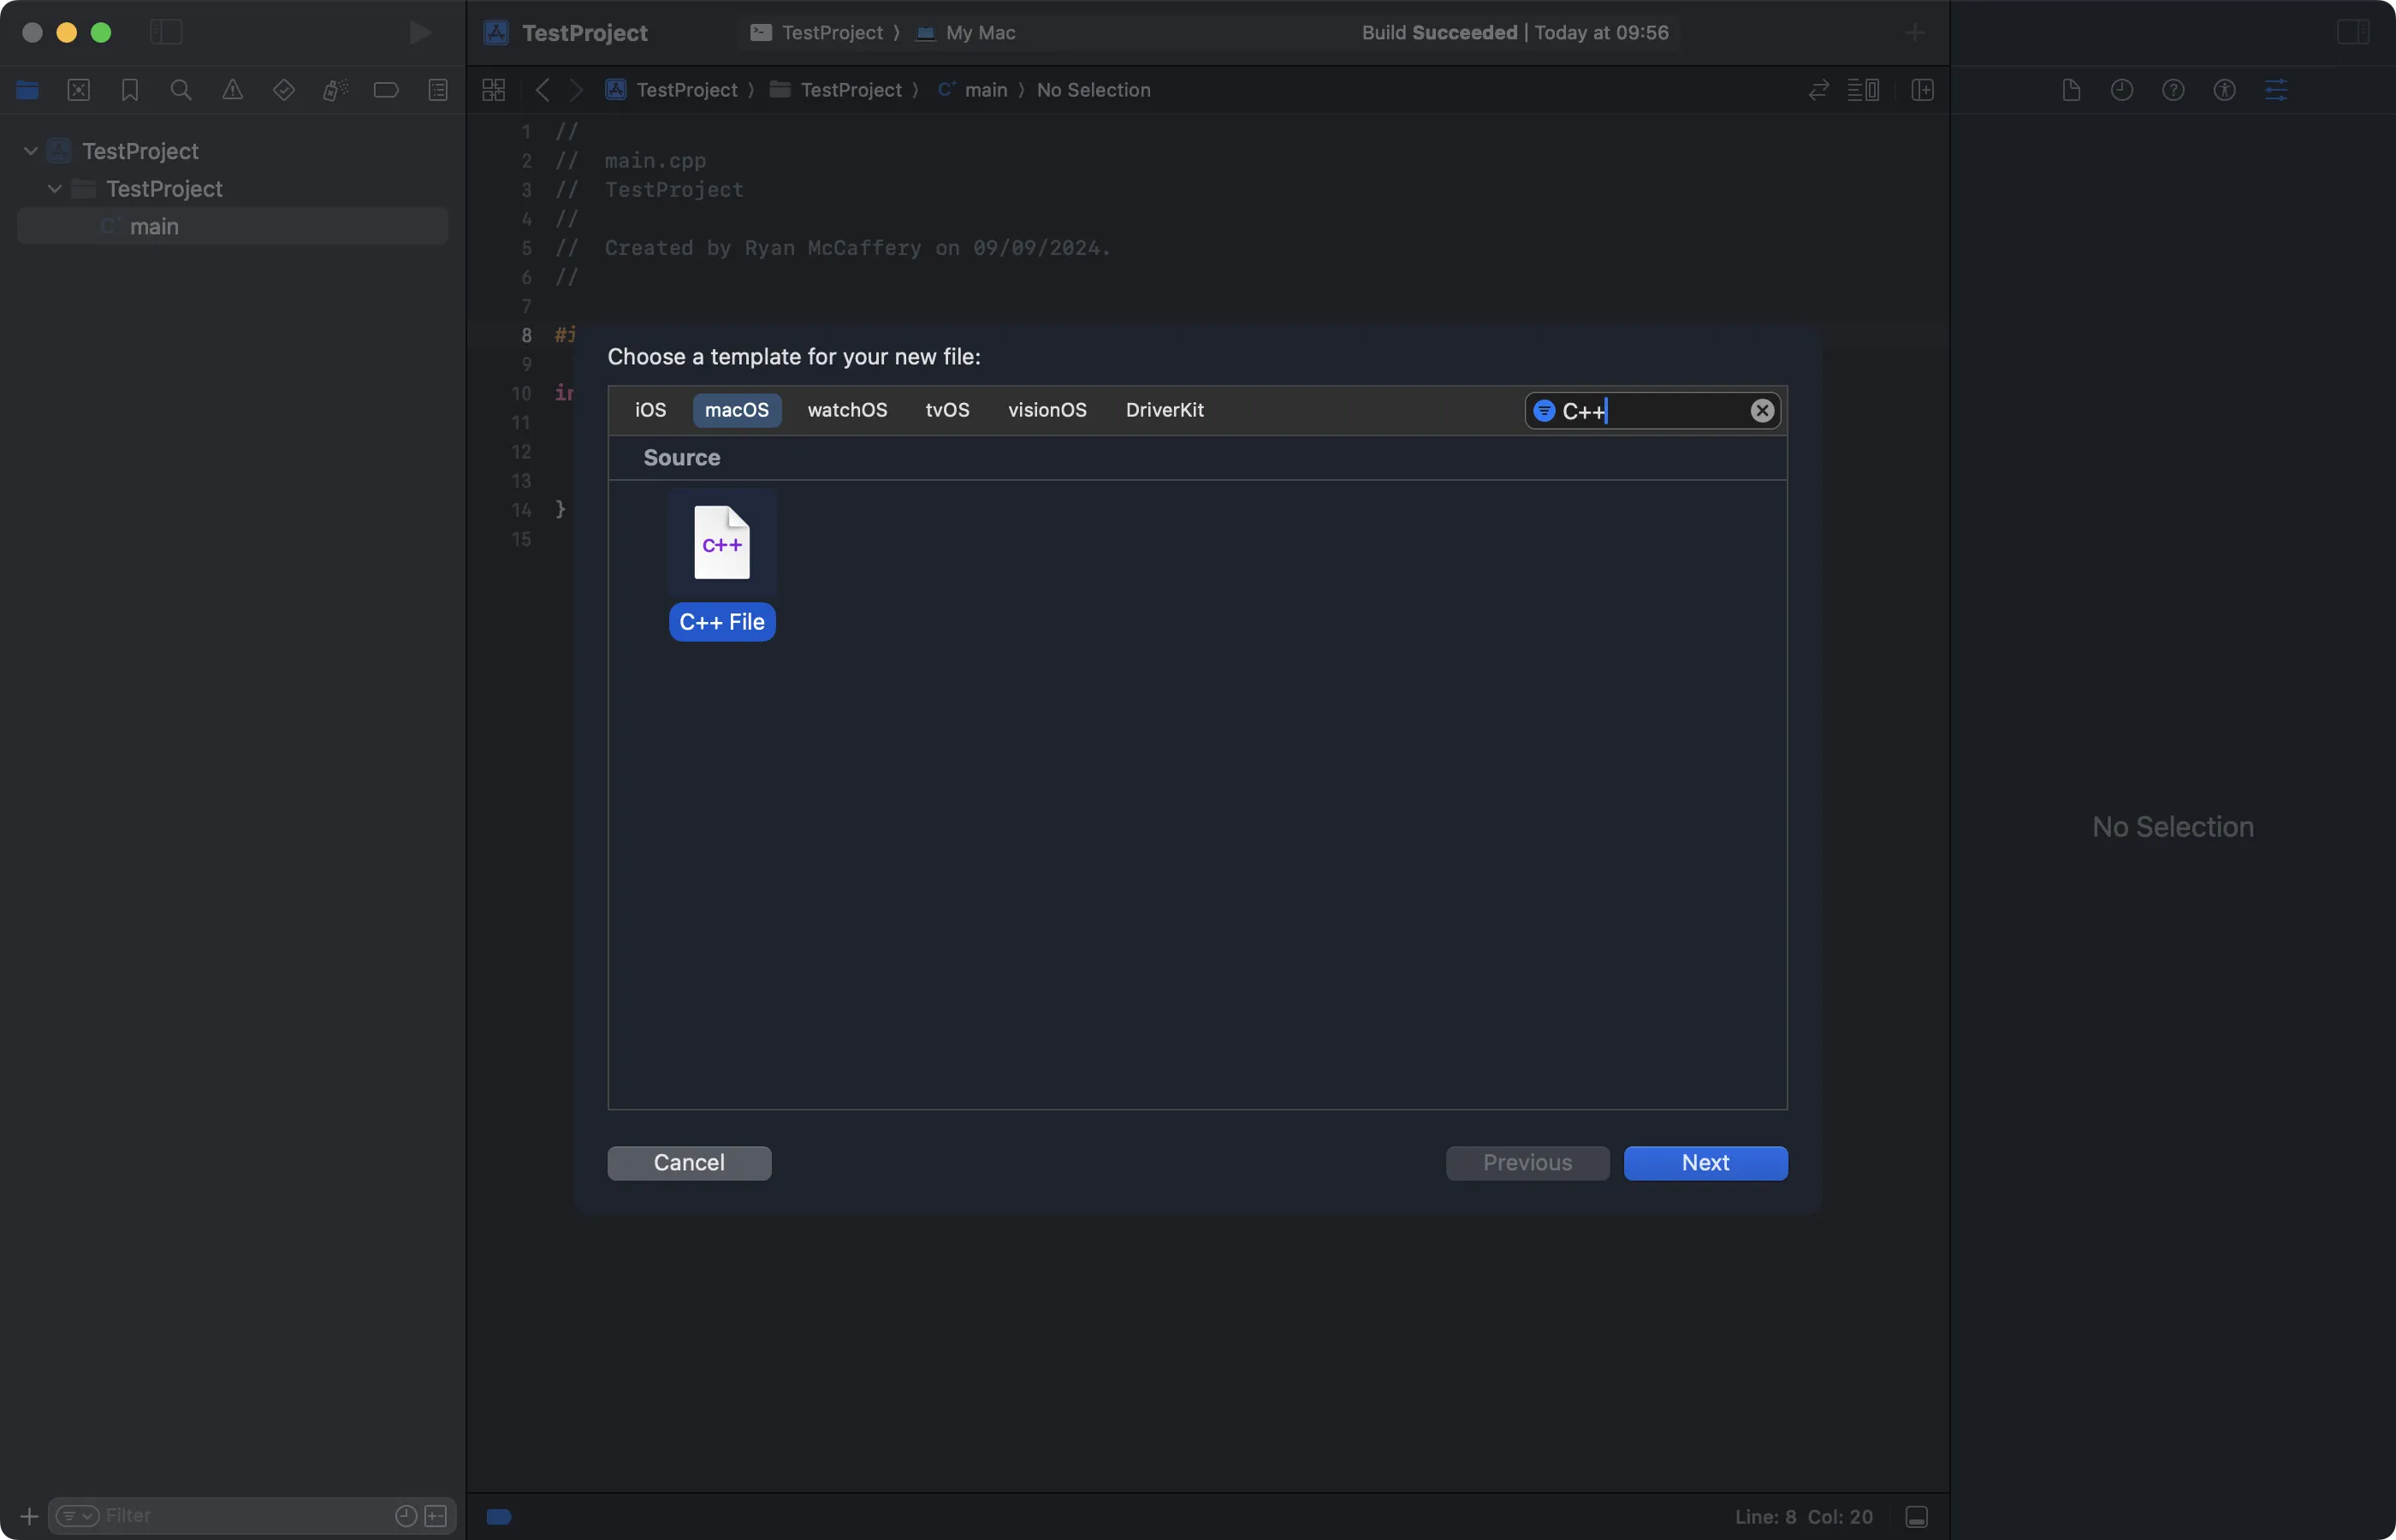
Lets add a C++ class to call in the main program, and then in XCTest
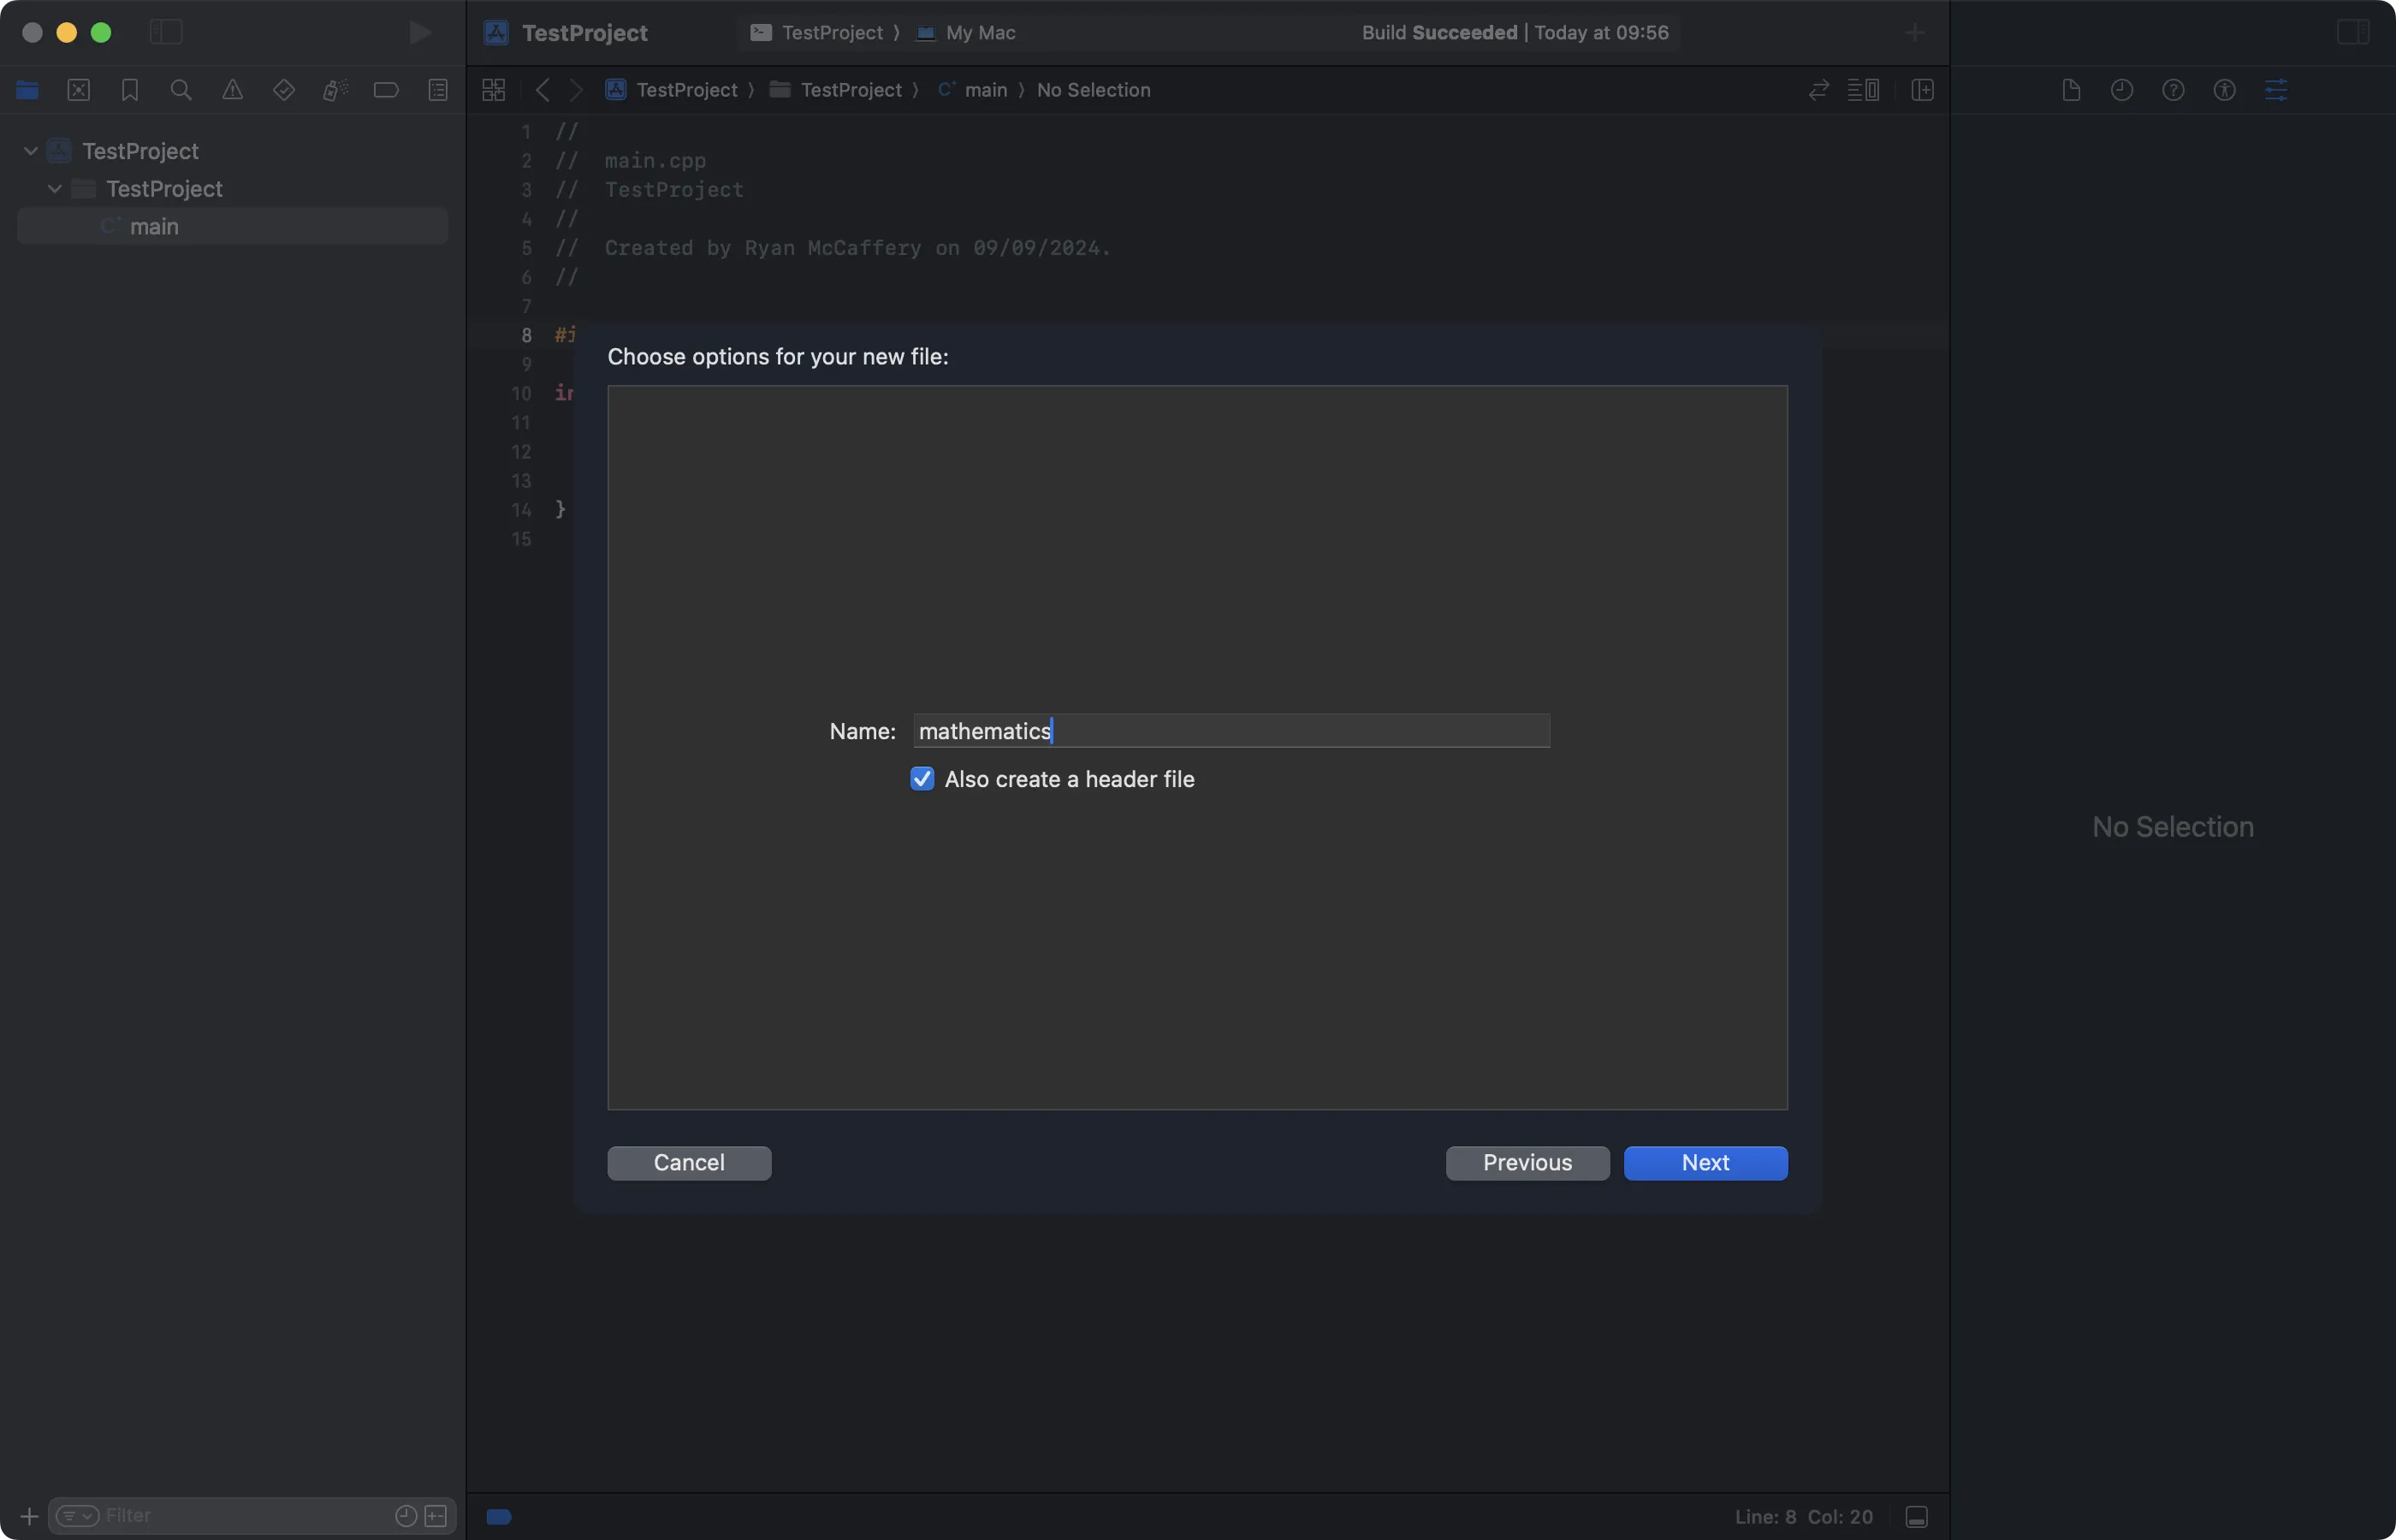
Make sure you tick to also create a header file
Adding the C++ Class
Next, we want to populate the mathematics.hpp and mathematics.cpp files with code to test
In mathematics.hpp we're going to add a header guard, a class, and a function:
#ifndef MATHEMATICS_H
#define MATHEMATICS_H

class Mathematics {
public:
    static int add(int a, int b);
};

#endif // MATHEMATICS_H
In mathematics.cpp* we are going to add the function with the logic code:
#include "mathematics.hpp"

int Mathematics::add(int a, int b) {
    return a + b;
}
We can now update main.cpp with the logic to call the function:
#include <iostream>
#include "mathematics.hpp"

int main() {
    int result = Mathematics::add(5, 3);
    std::cout << "5 + 3 = " << result << std::endl;
    return 0;
}
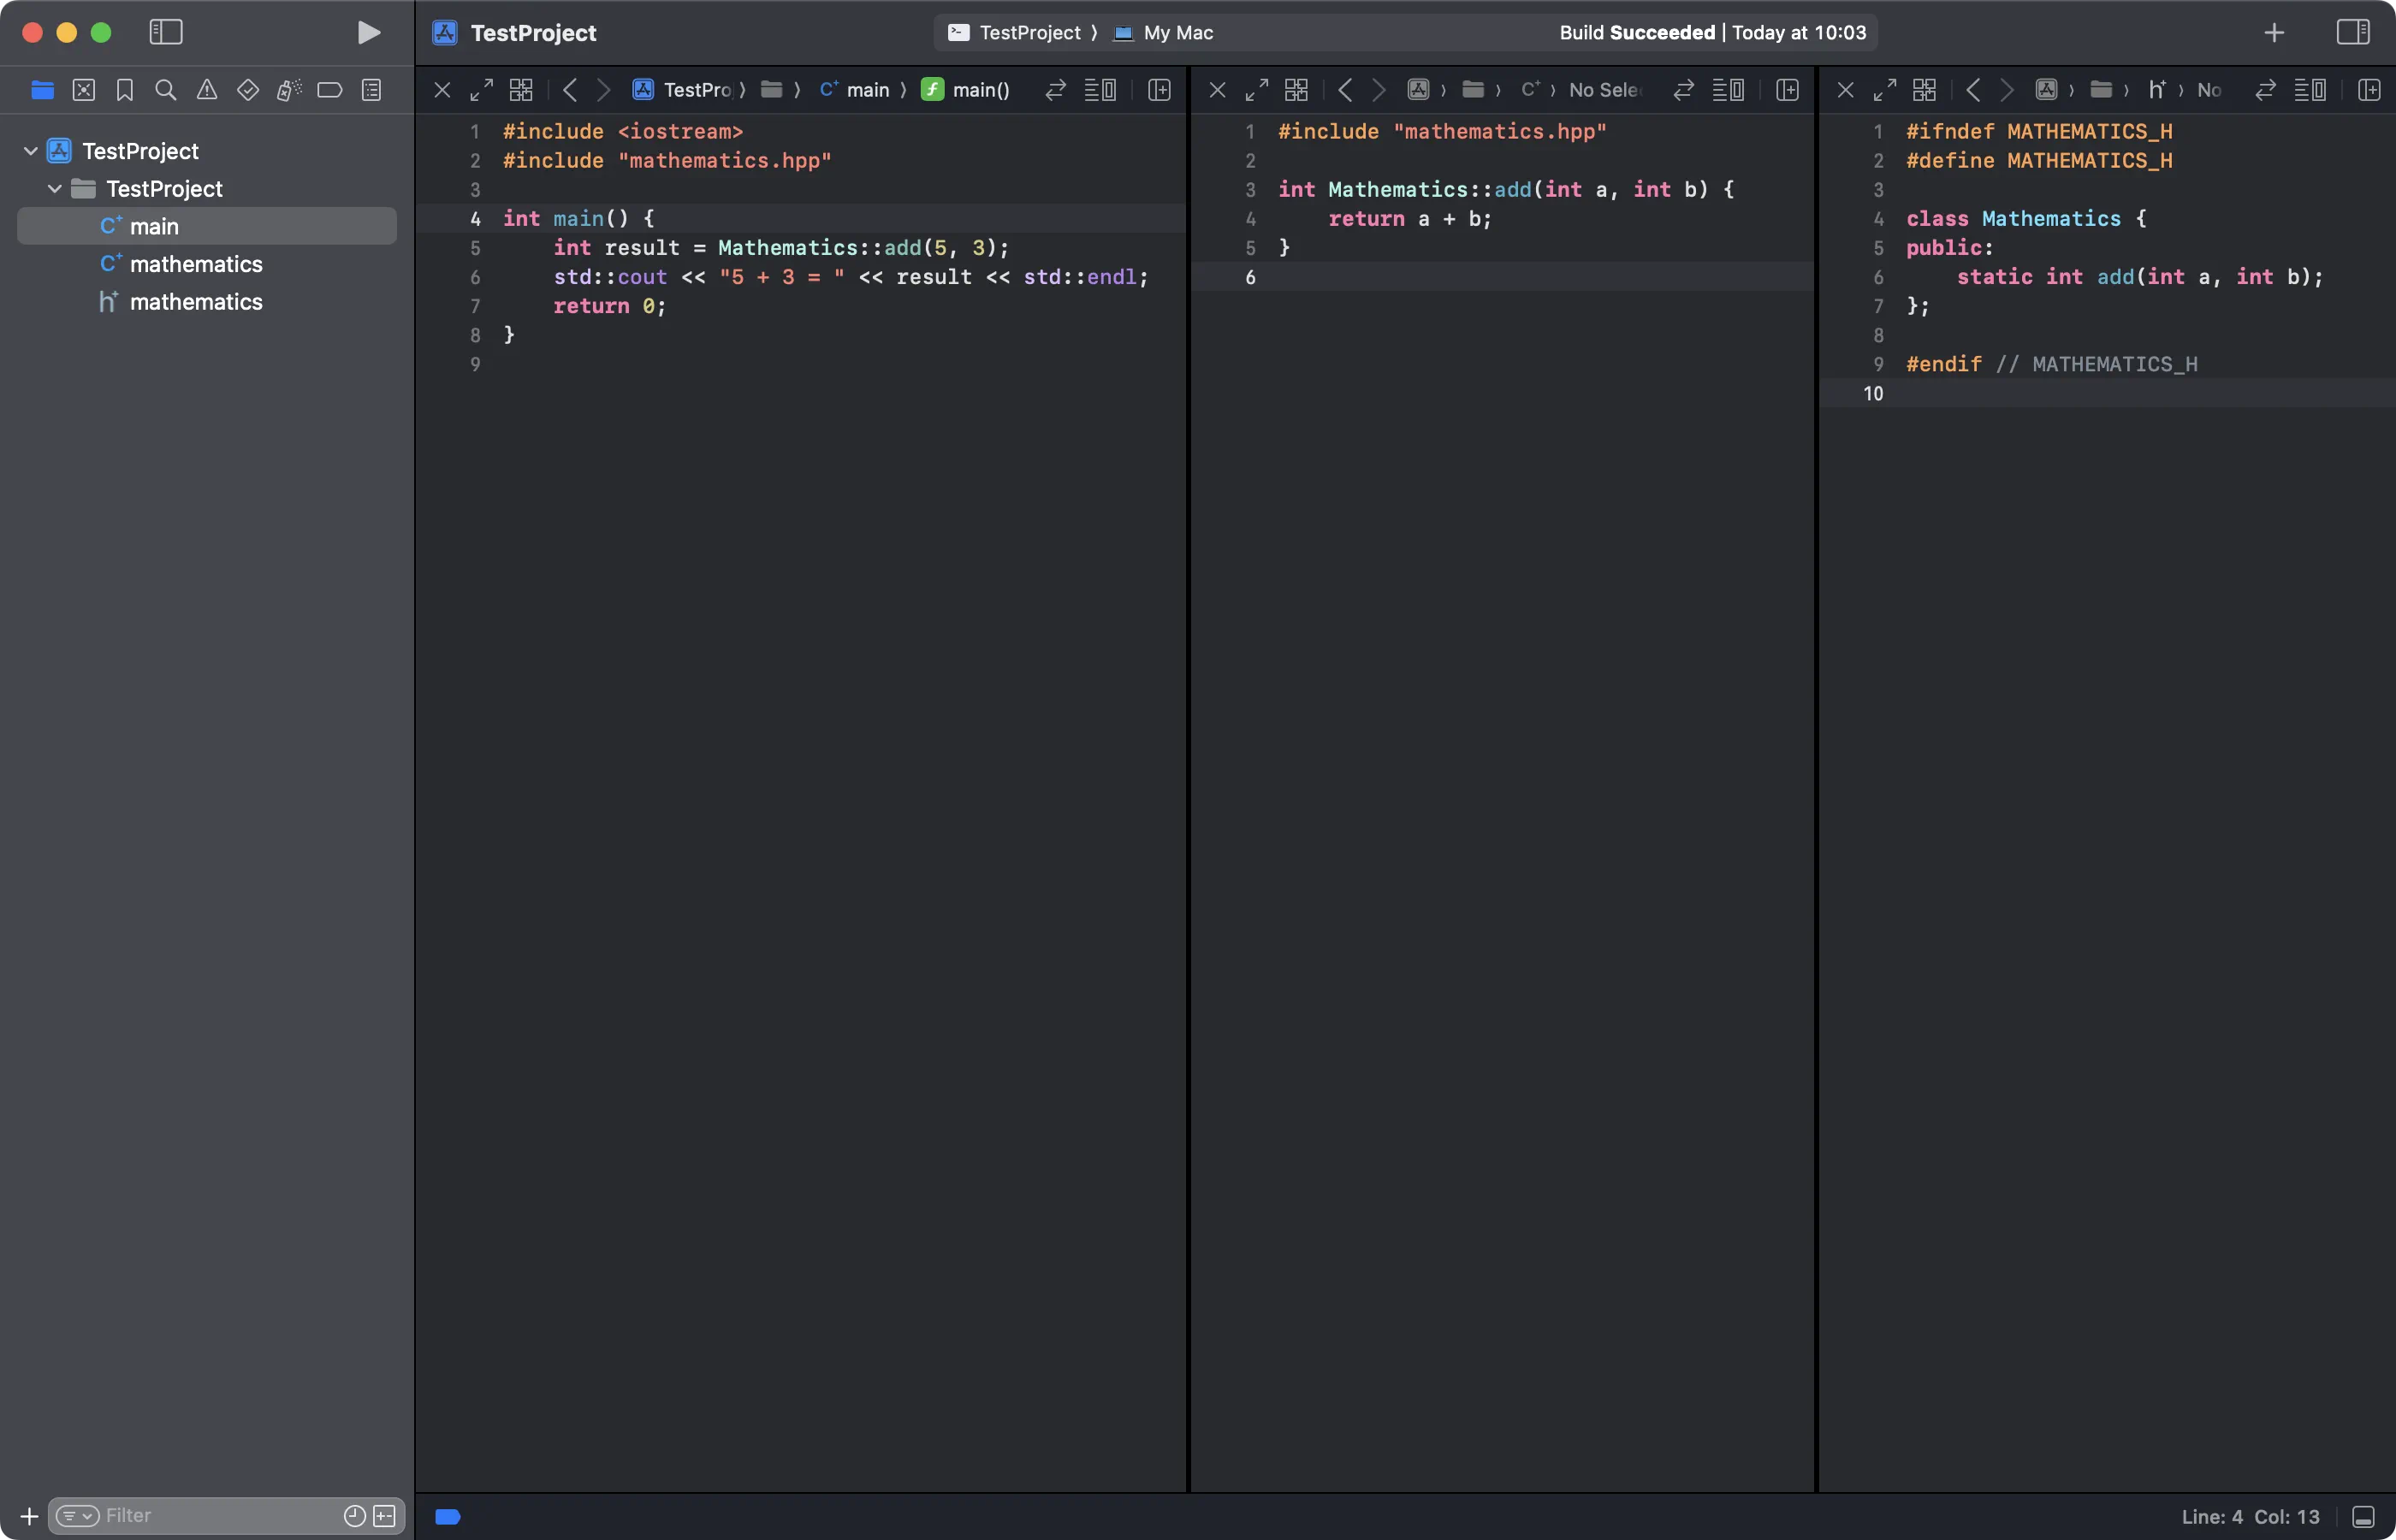
You should now have three files, main.cpp, mathematics.hpp, and mathematics.cpp:
You should build to check everything is working as it should, CTRL + B and to run CTRL + R
You should see the terminal with
5 + 3 = 8
Program ended with exit code: 0
Adding the XCTests
Add a new target

Select a unit testing bunlde
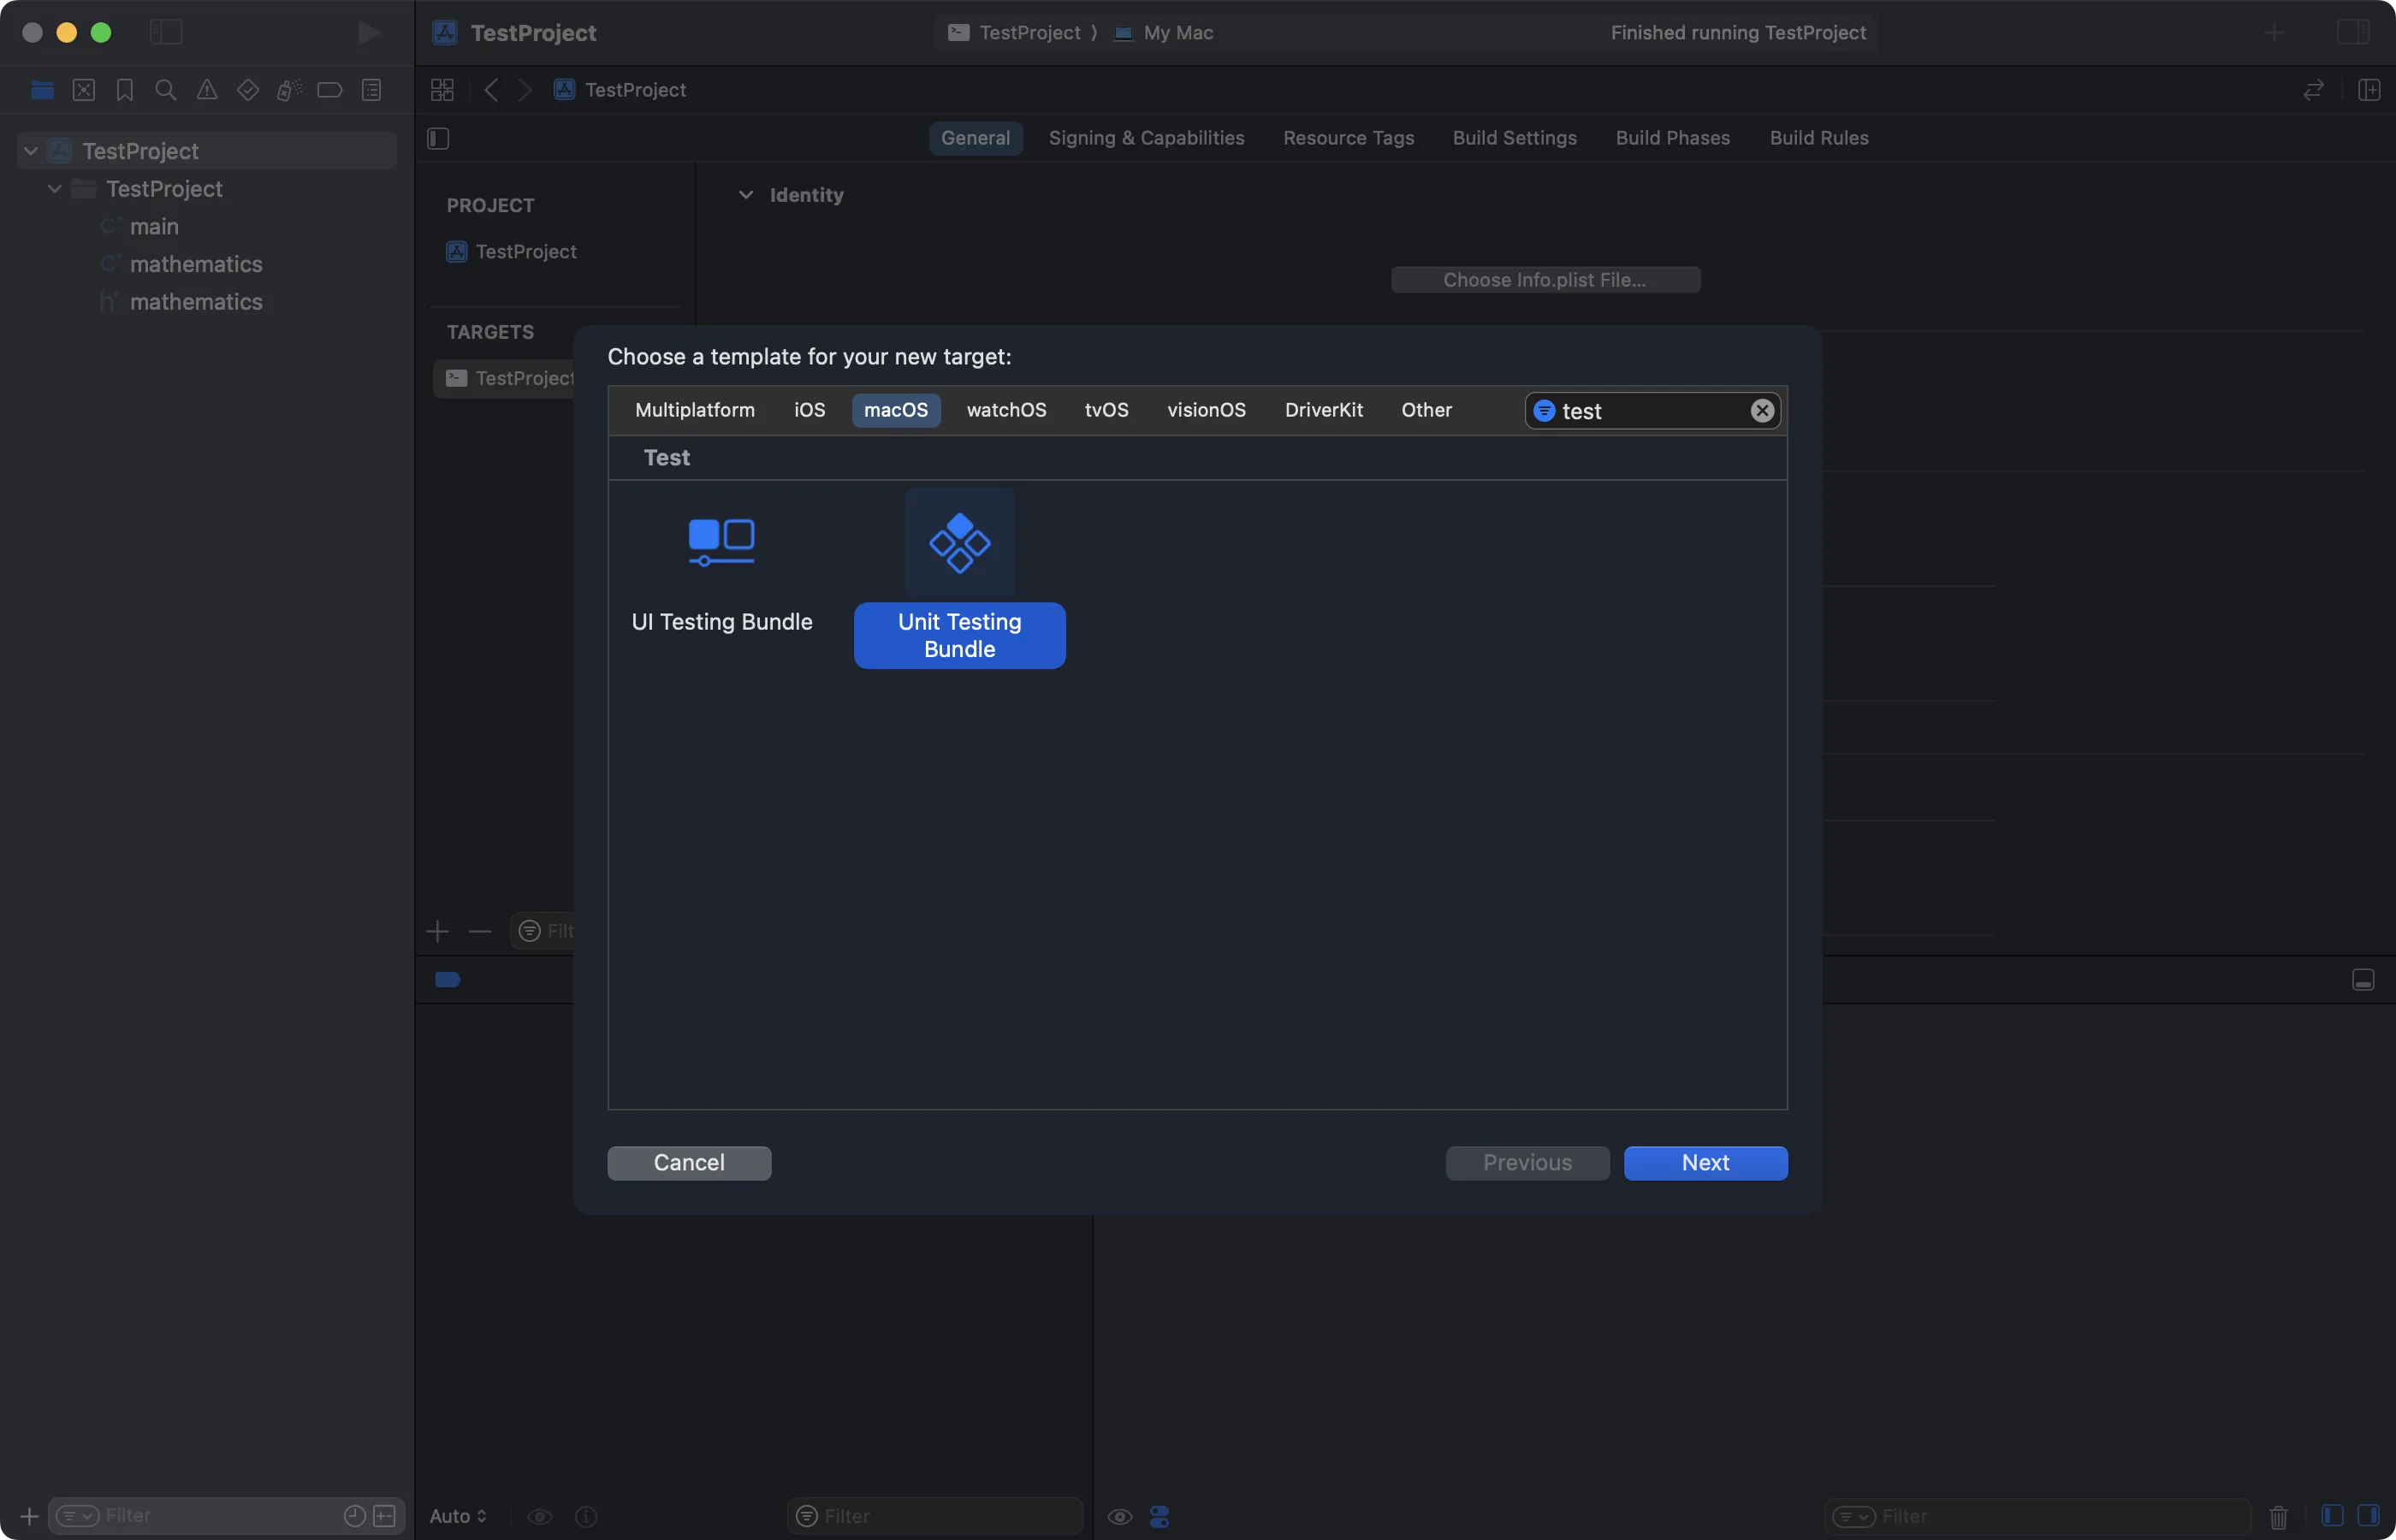
Select Objective C as the language
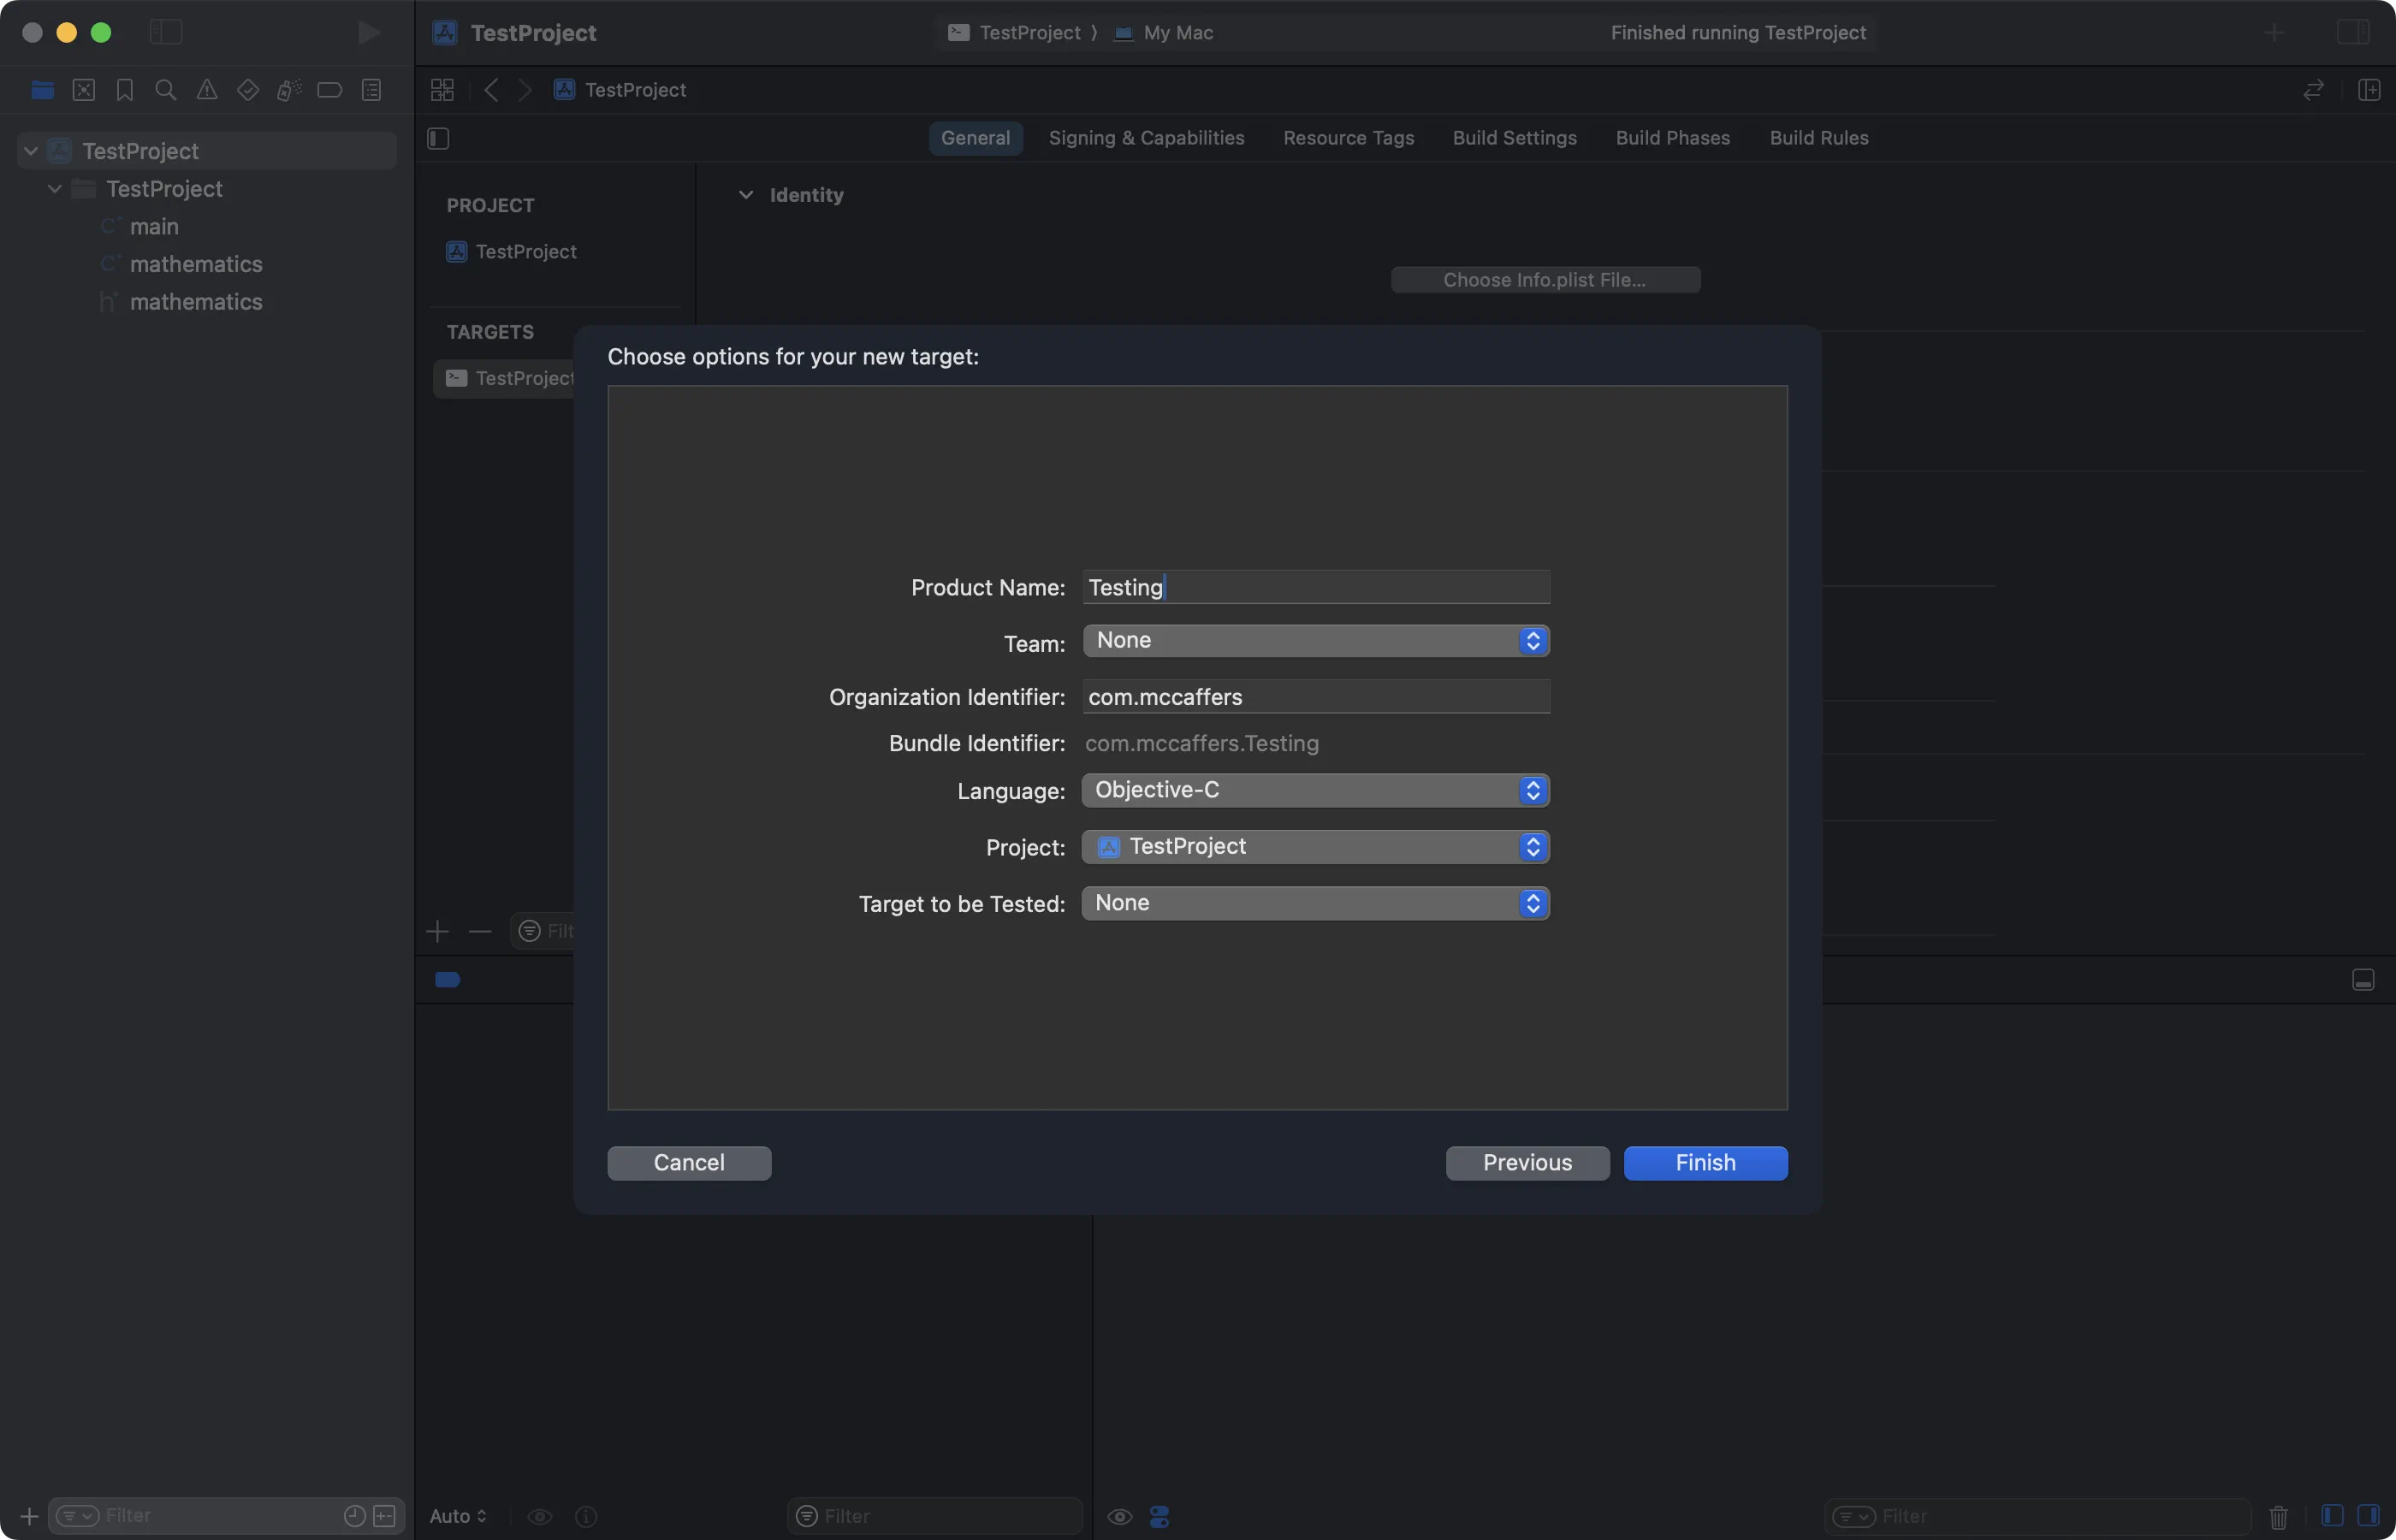
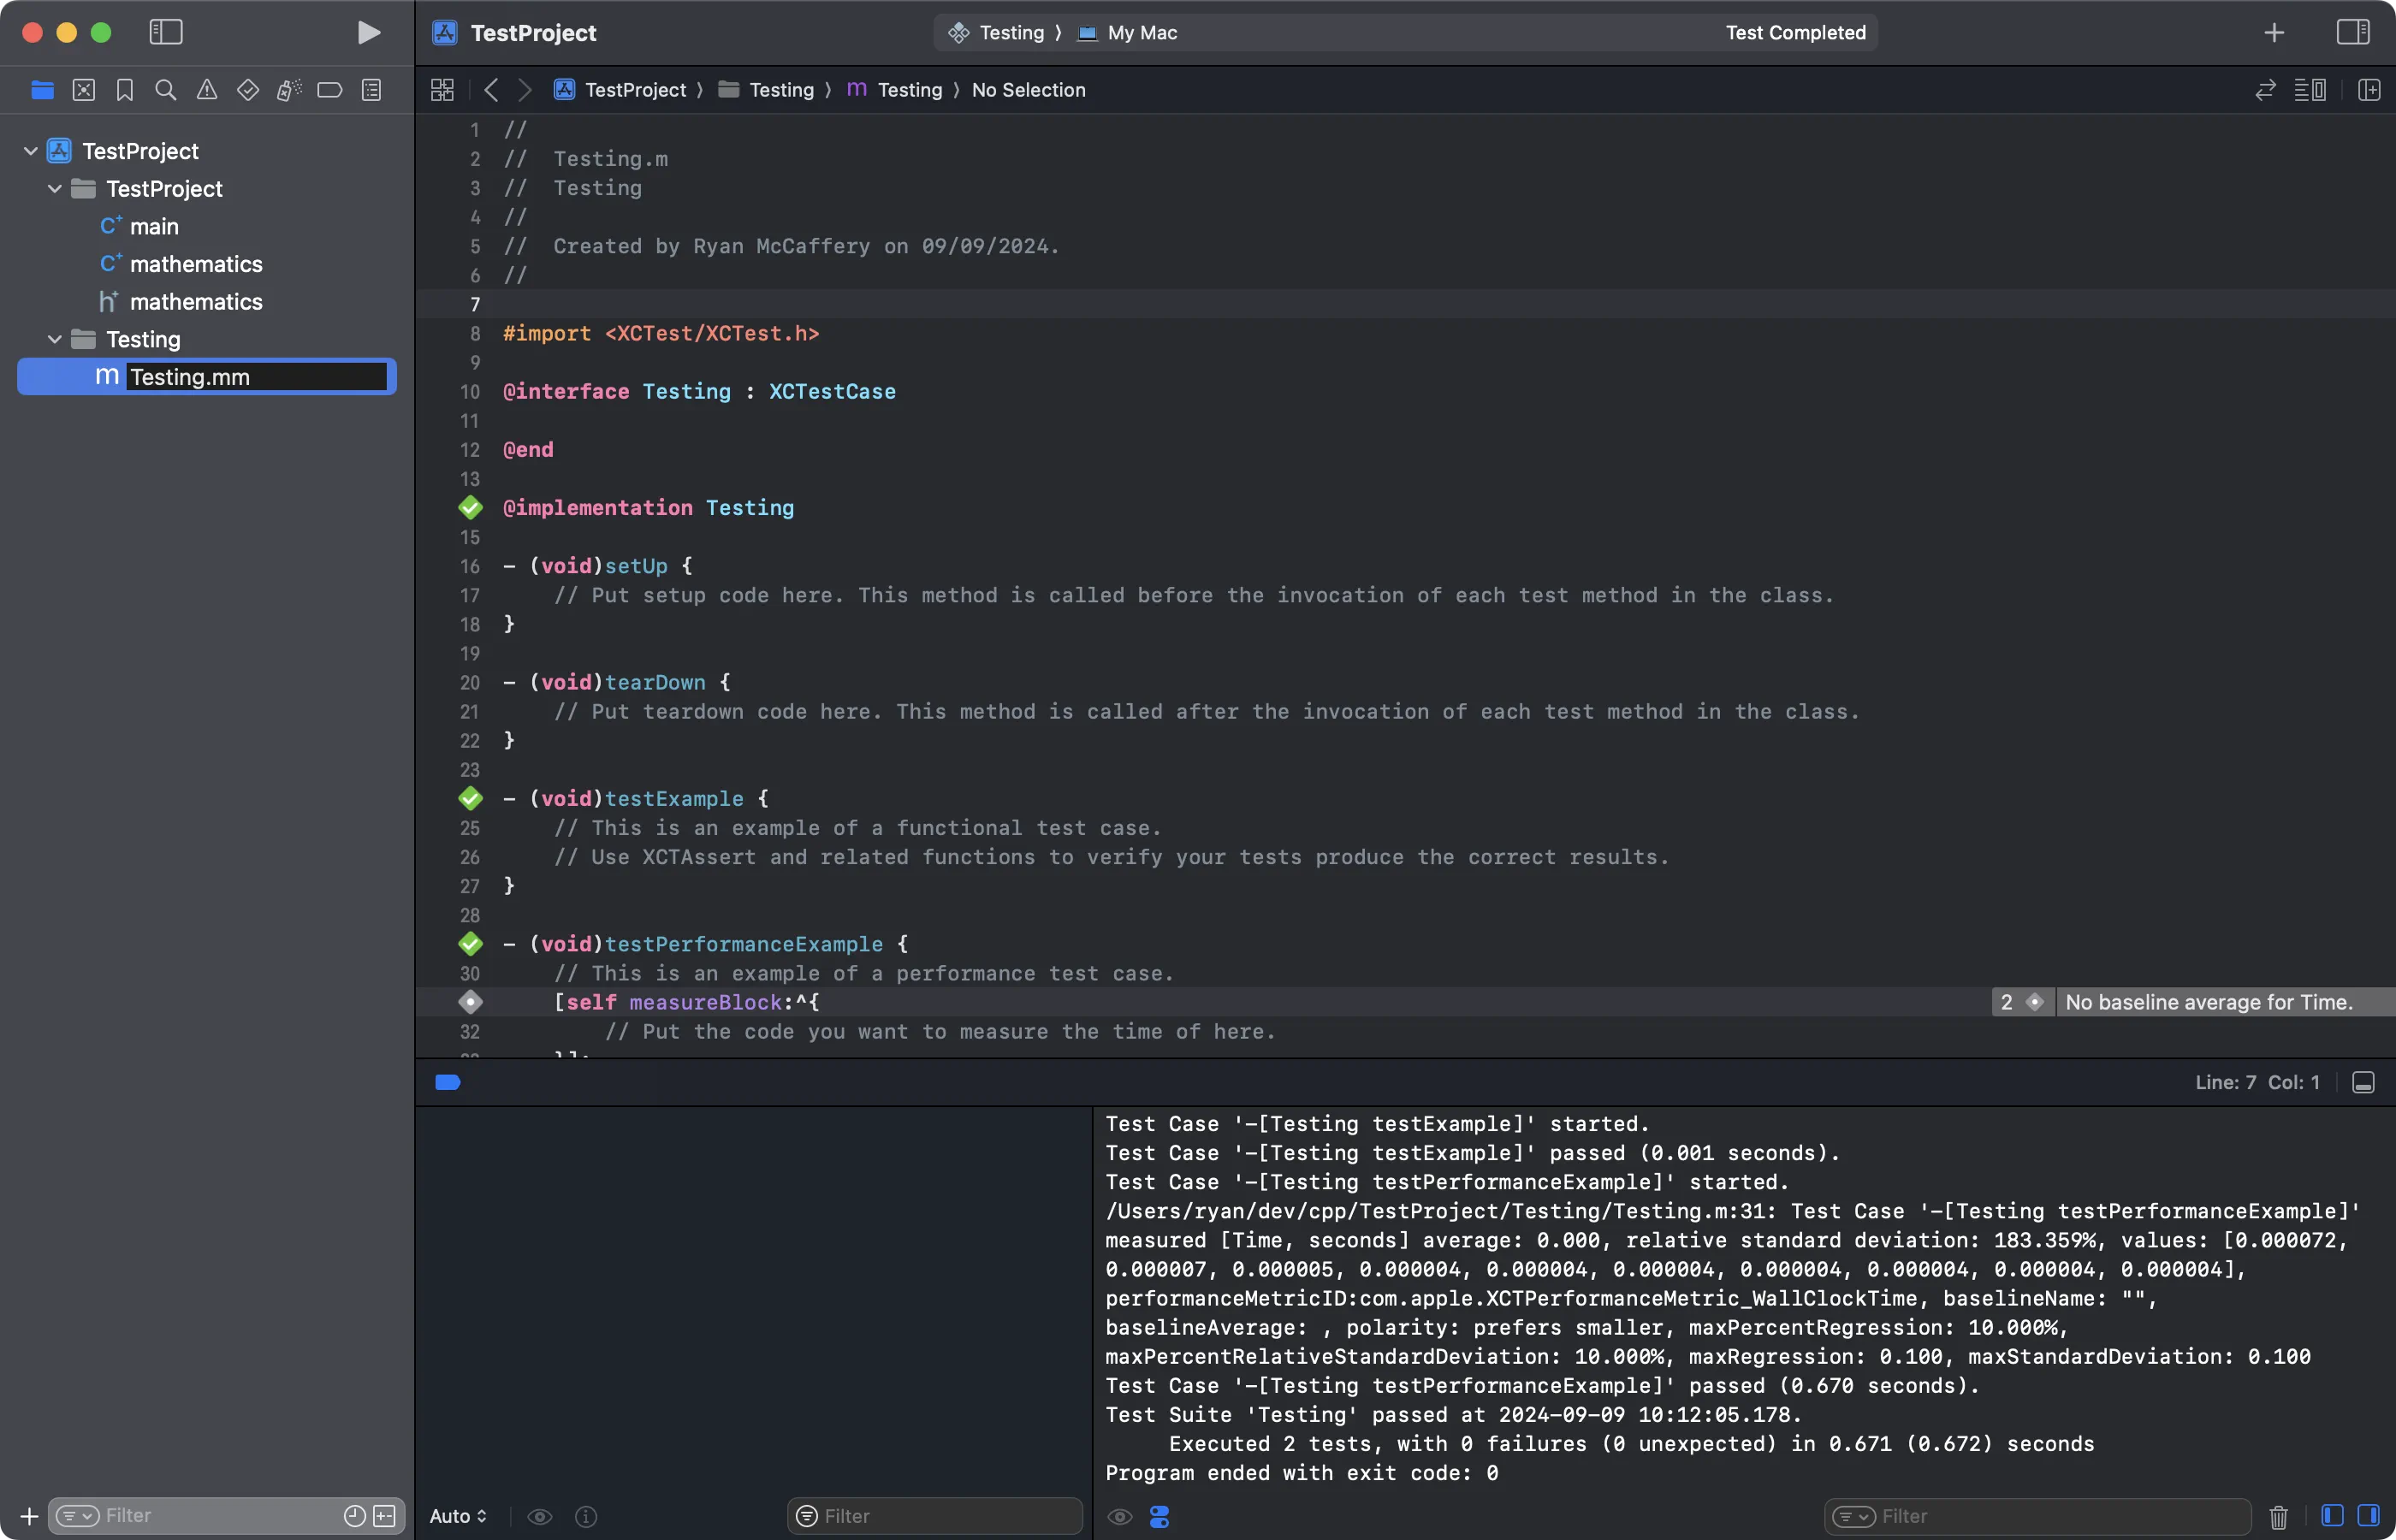
Rename the testing file to have two m's. so Testing.mm
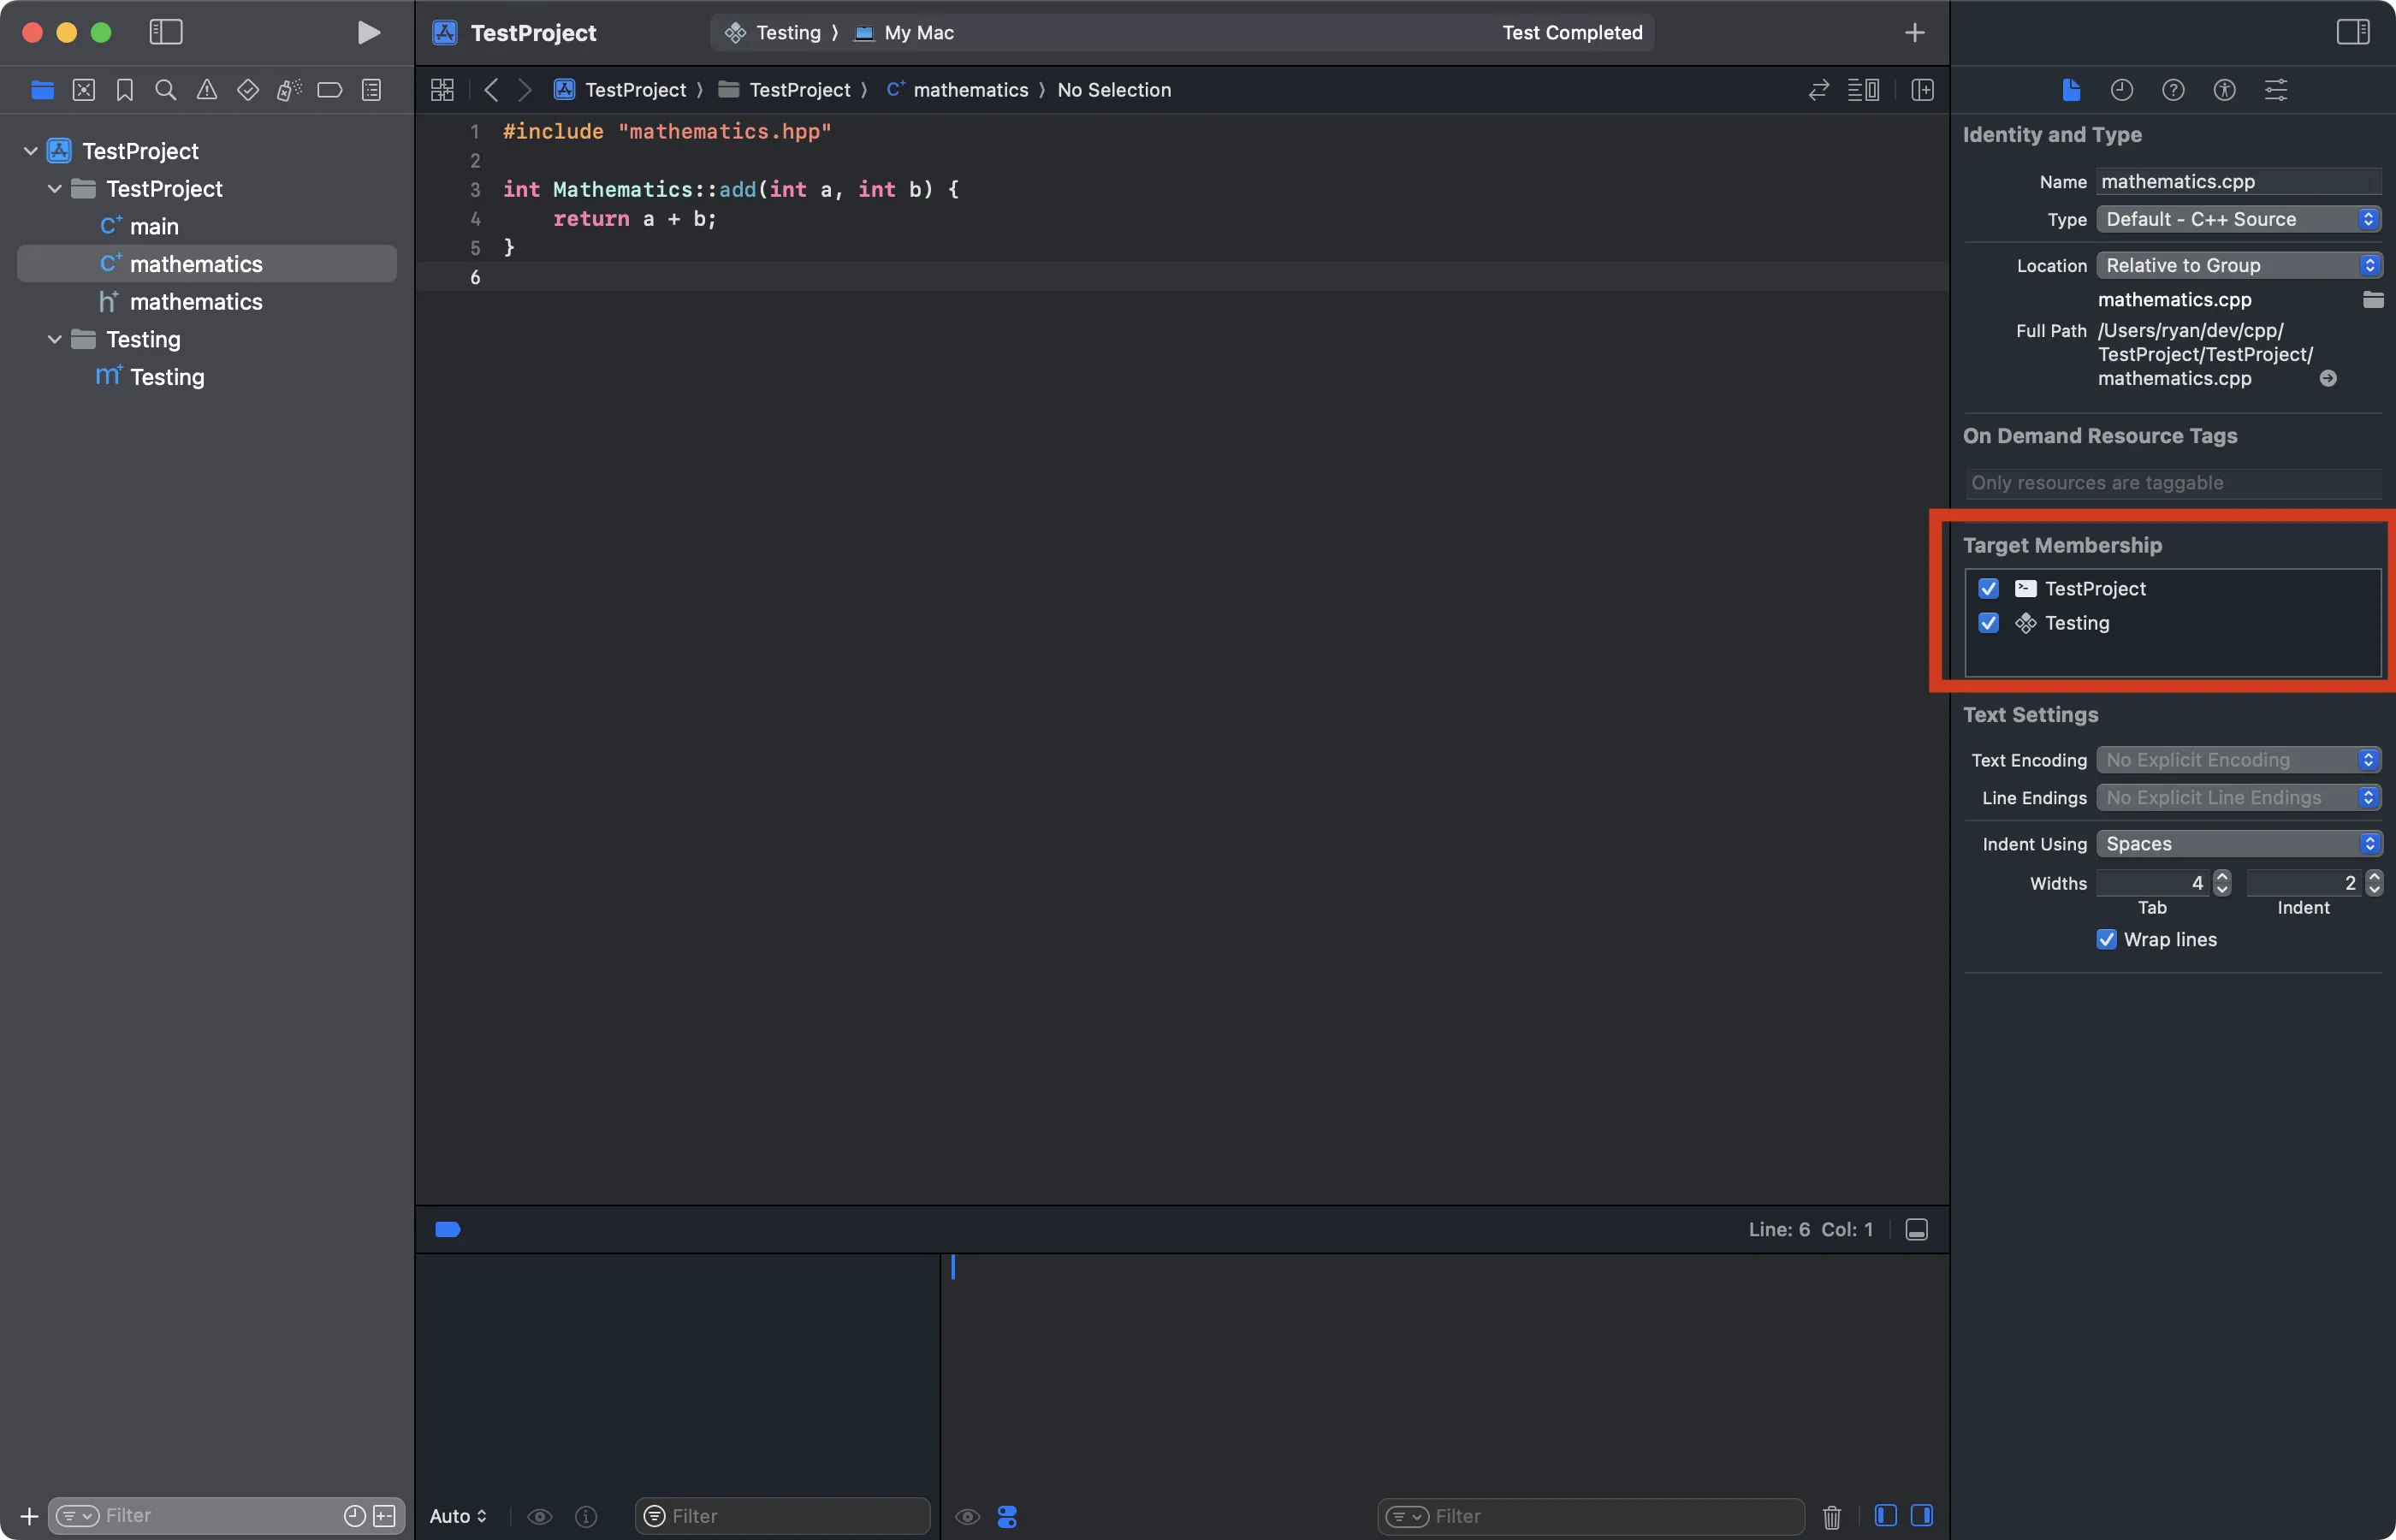
Tick the target membership on the mathematics.cpp file so that the Unit Test Bundle is able to access it
In the test bundle, in file Testing.mm add the header:
#import "mathematics.hpp"
Update the testExample function to call the Mathematics class:
- (void)testExample {
    XCTAssertEqual(Mathematics().add(1, 1), 2);
}
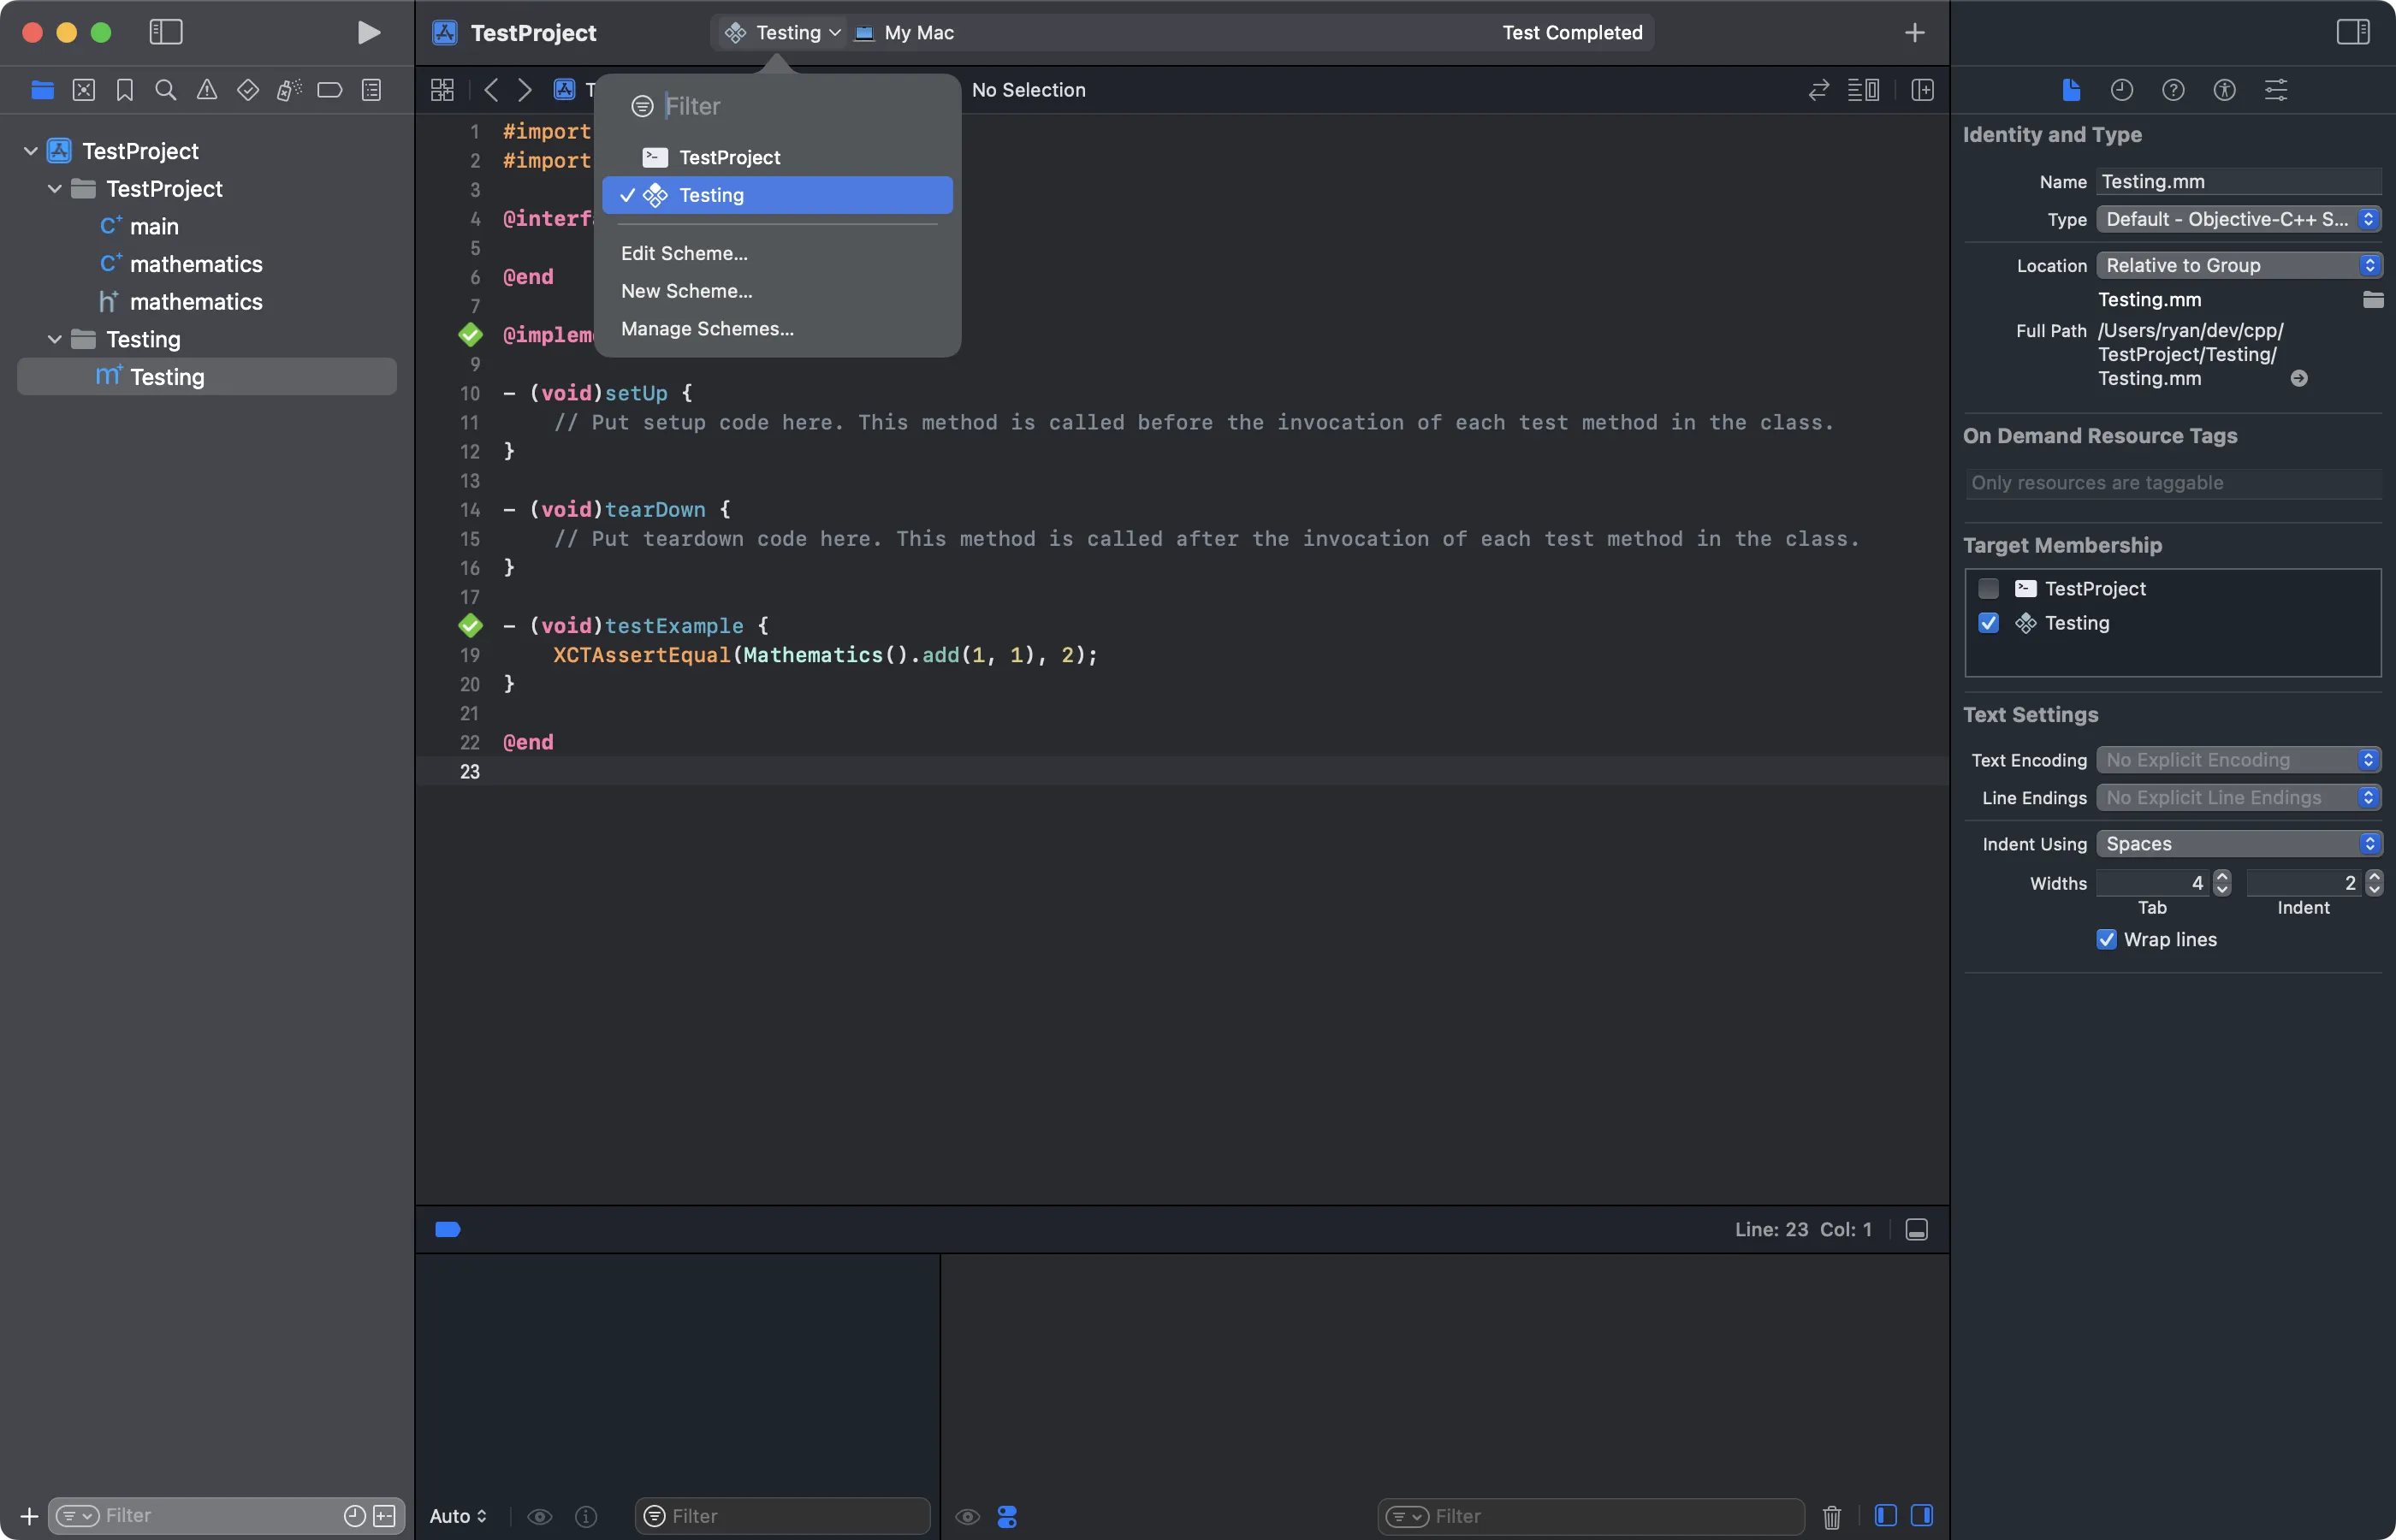
The Testing.mm file should look like this:

Change the schema to run the test
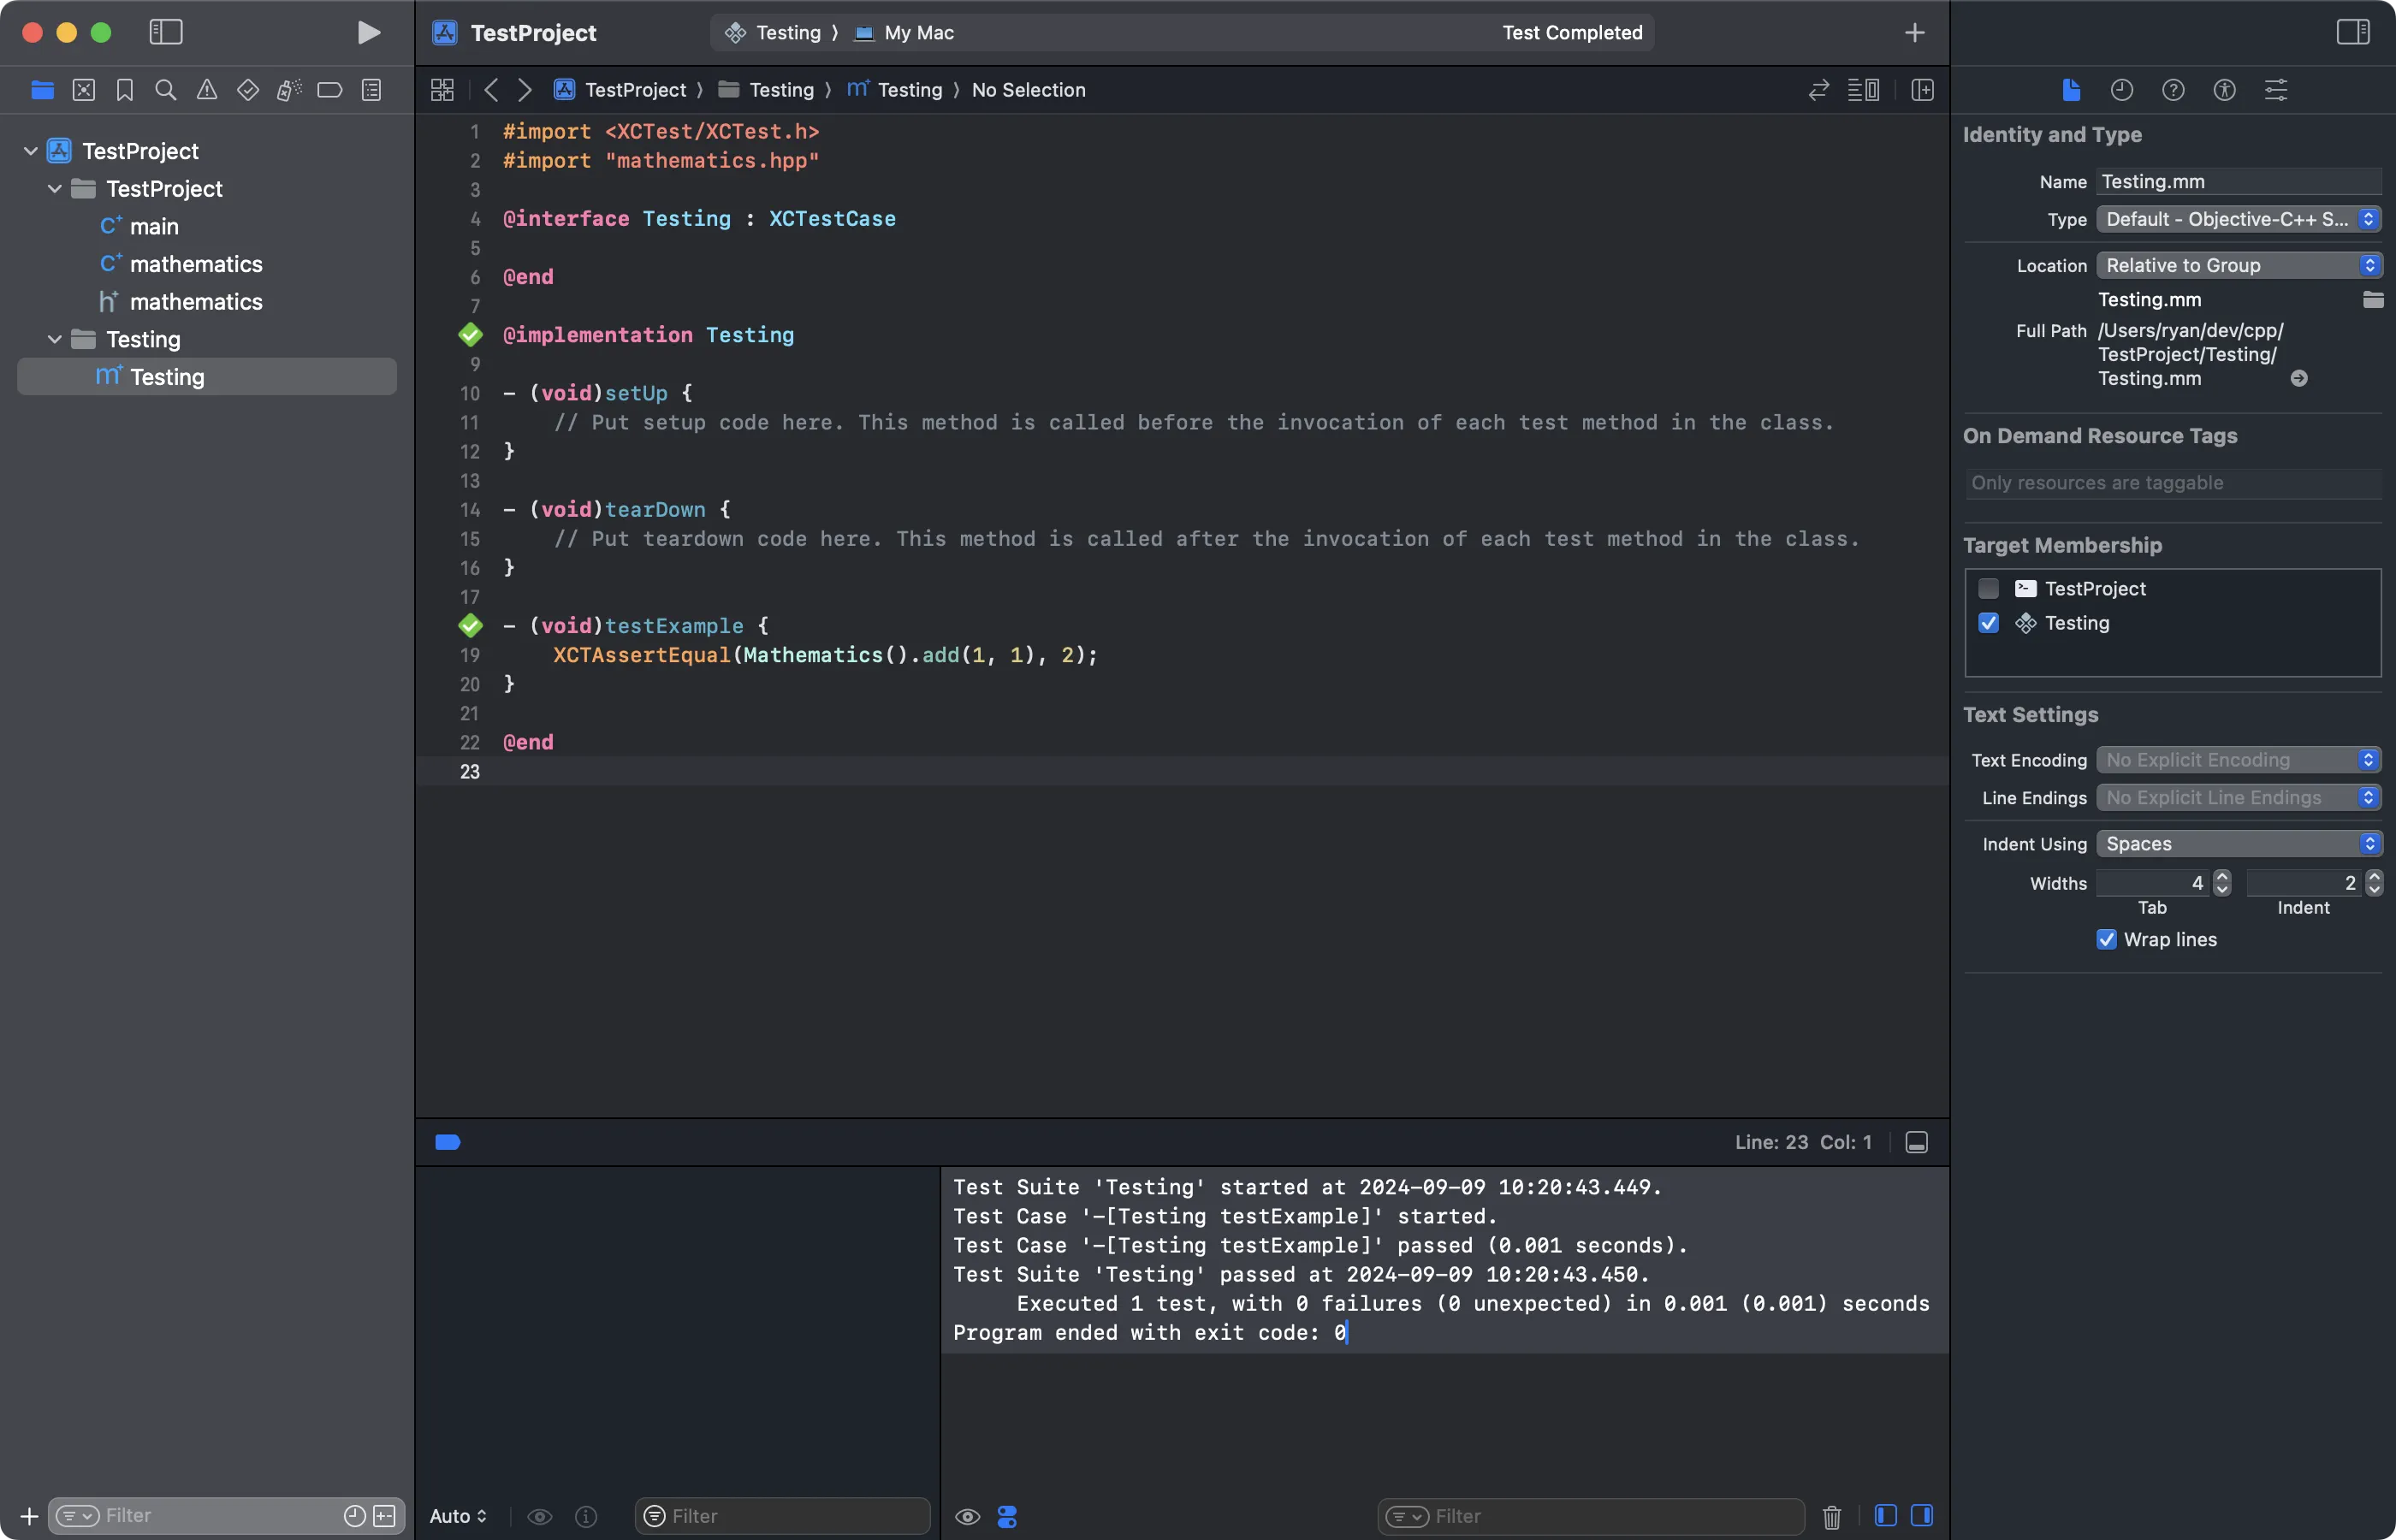
You can click the diamond next to textExample or run all tests with CTRL + U, you should see this output:
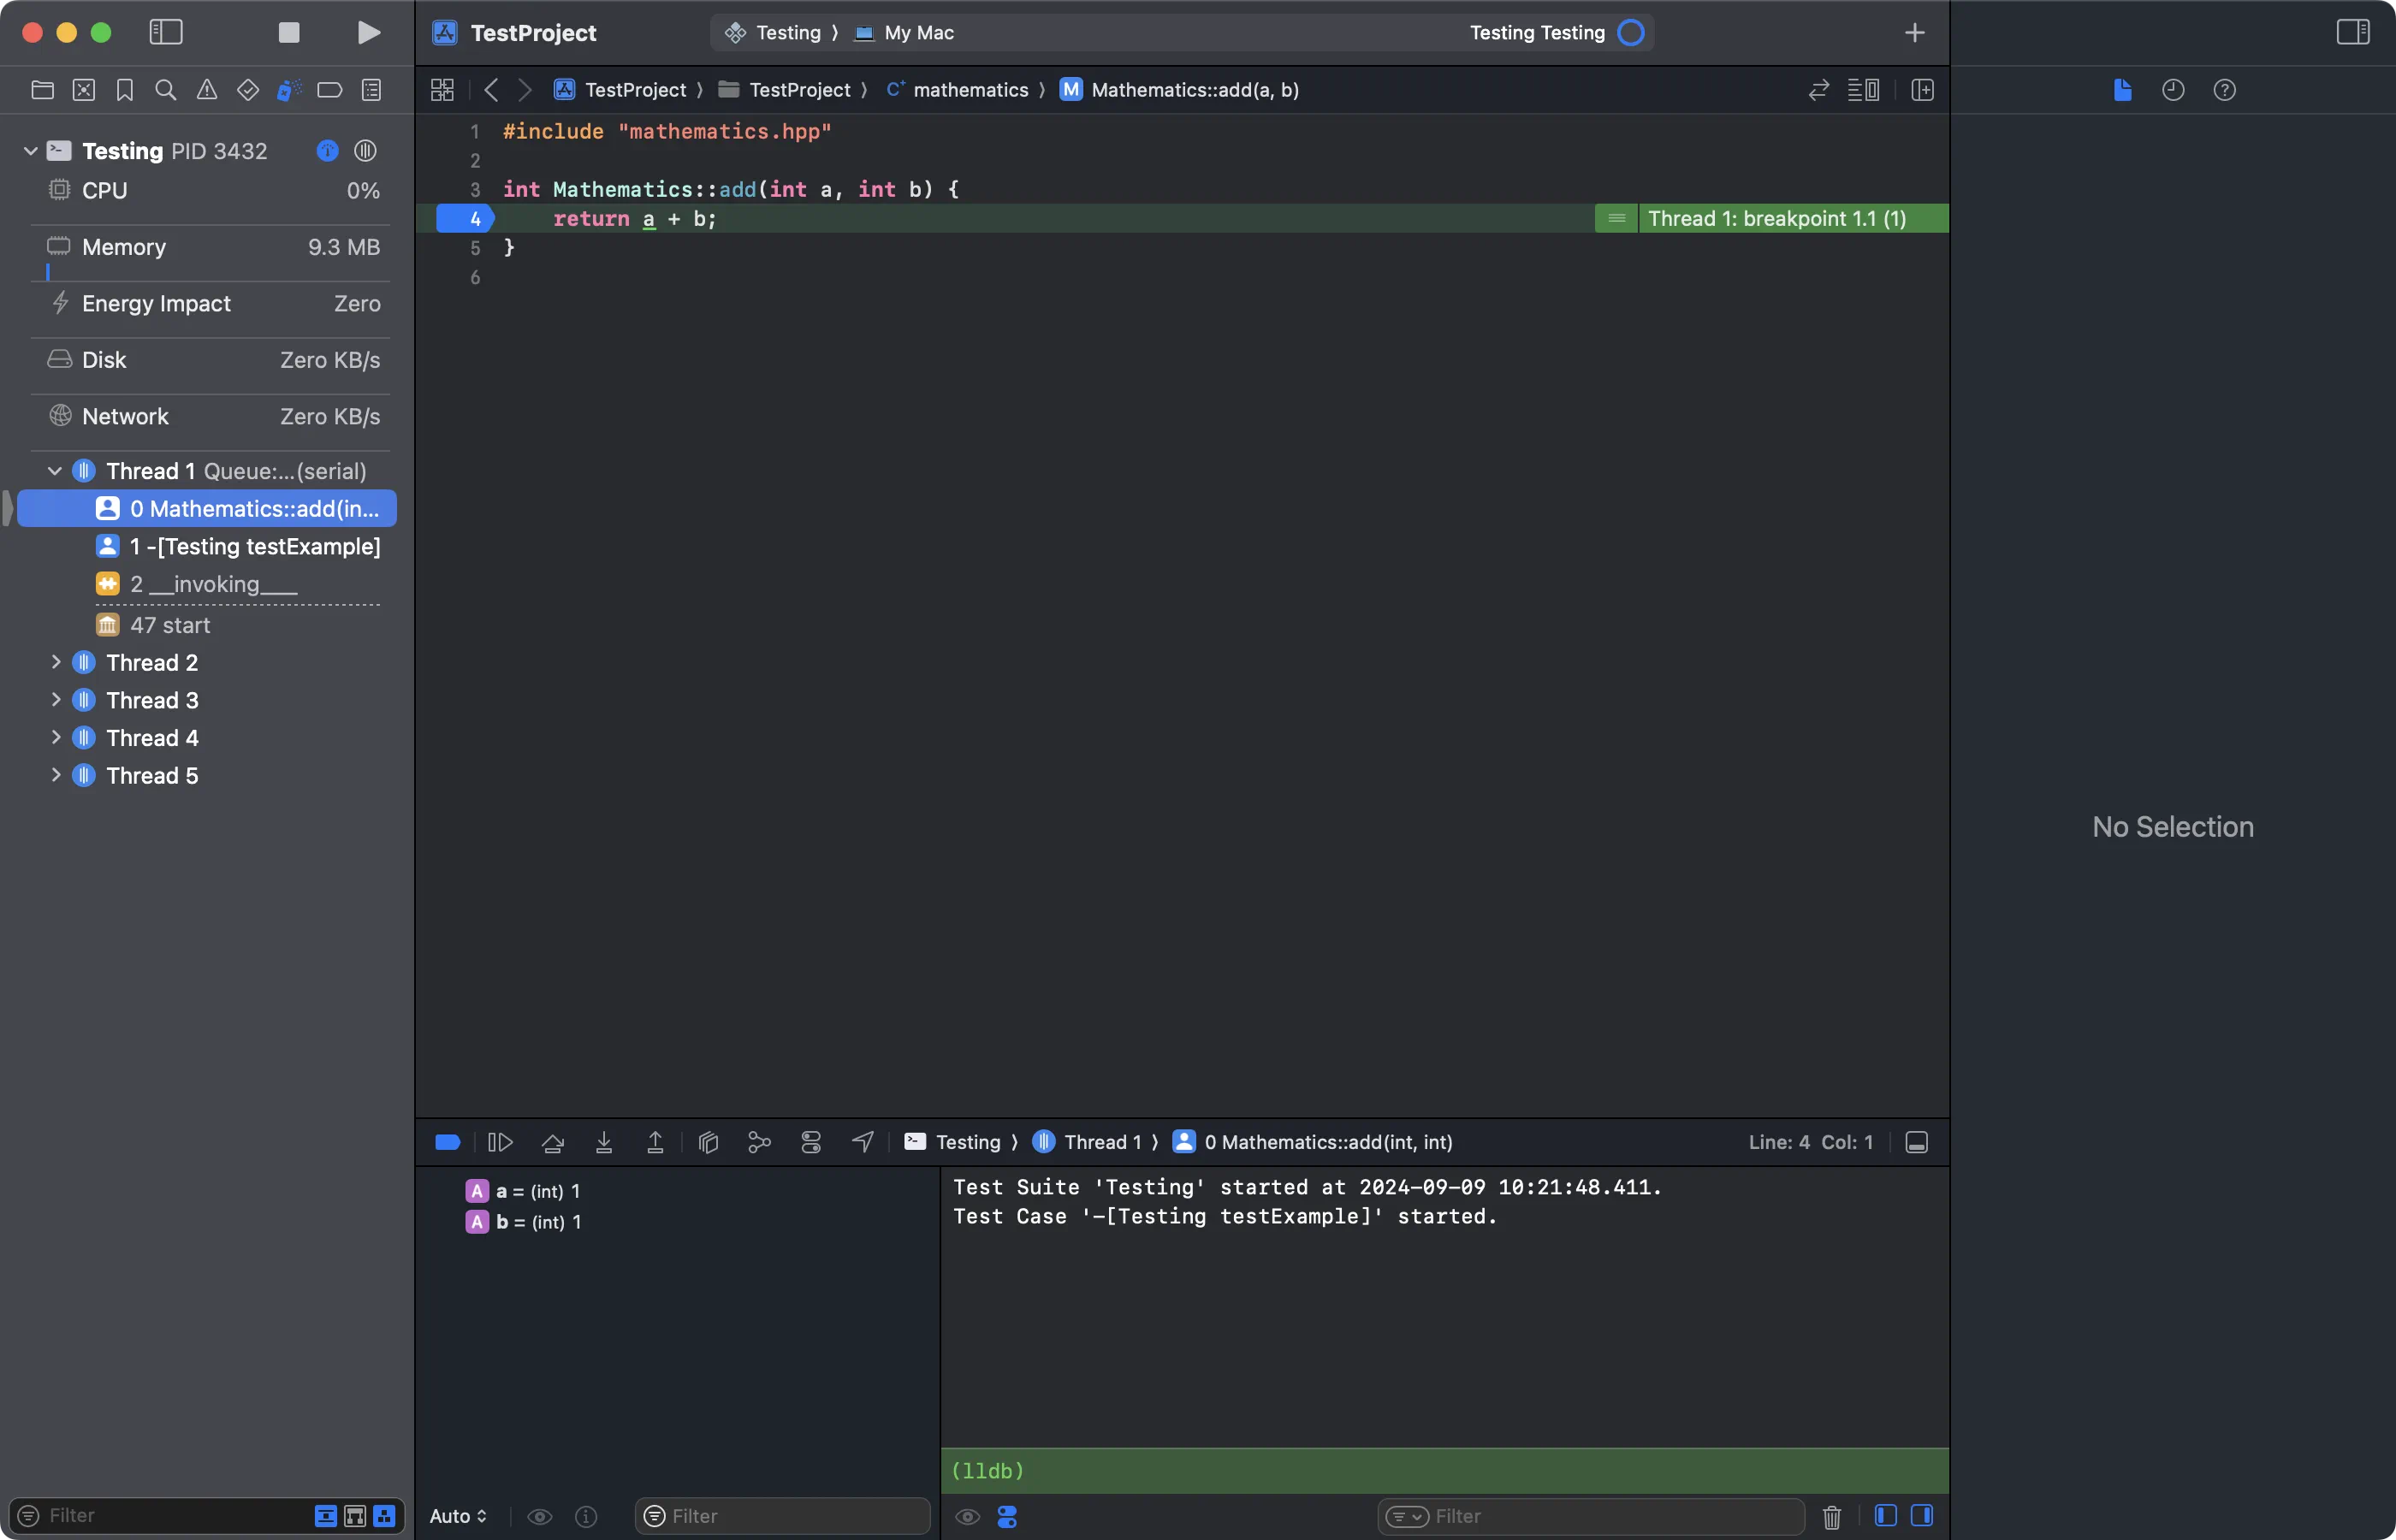
You can now go back to mathematics.cpp and add breakpoints. Add a breakpoint to line 4 (the logic in the function), and then rerun the test.
Thats it! It's time to expand your codebase with more code, and unit tests!